
WalletConnect is an open protocol that allows secure connections between decentralized applications (dApps) and cryptocurrency wallets through QR code scanning or deep linking. It was created to facilitate seamless interaction between users and dApps without compromising on security.
Note: Link your Cryptnox hardware wallet card with the Cryptnox Wallet application and the WalletConnect linking functionality.
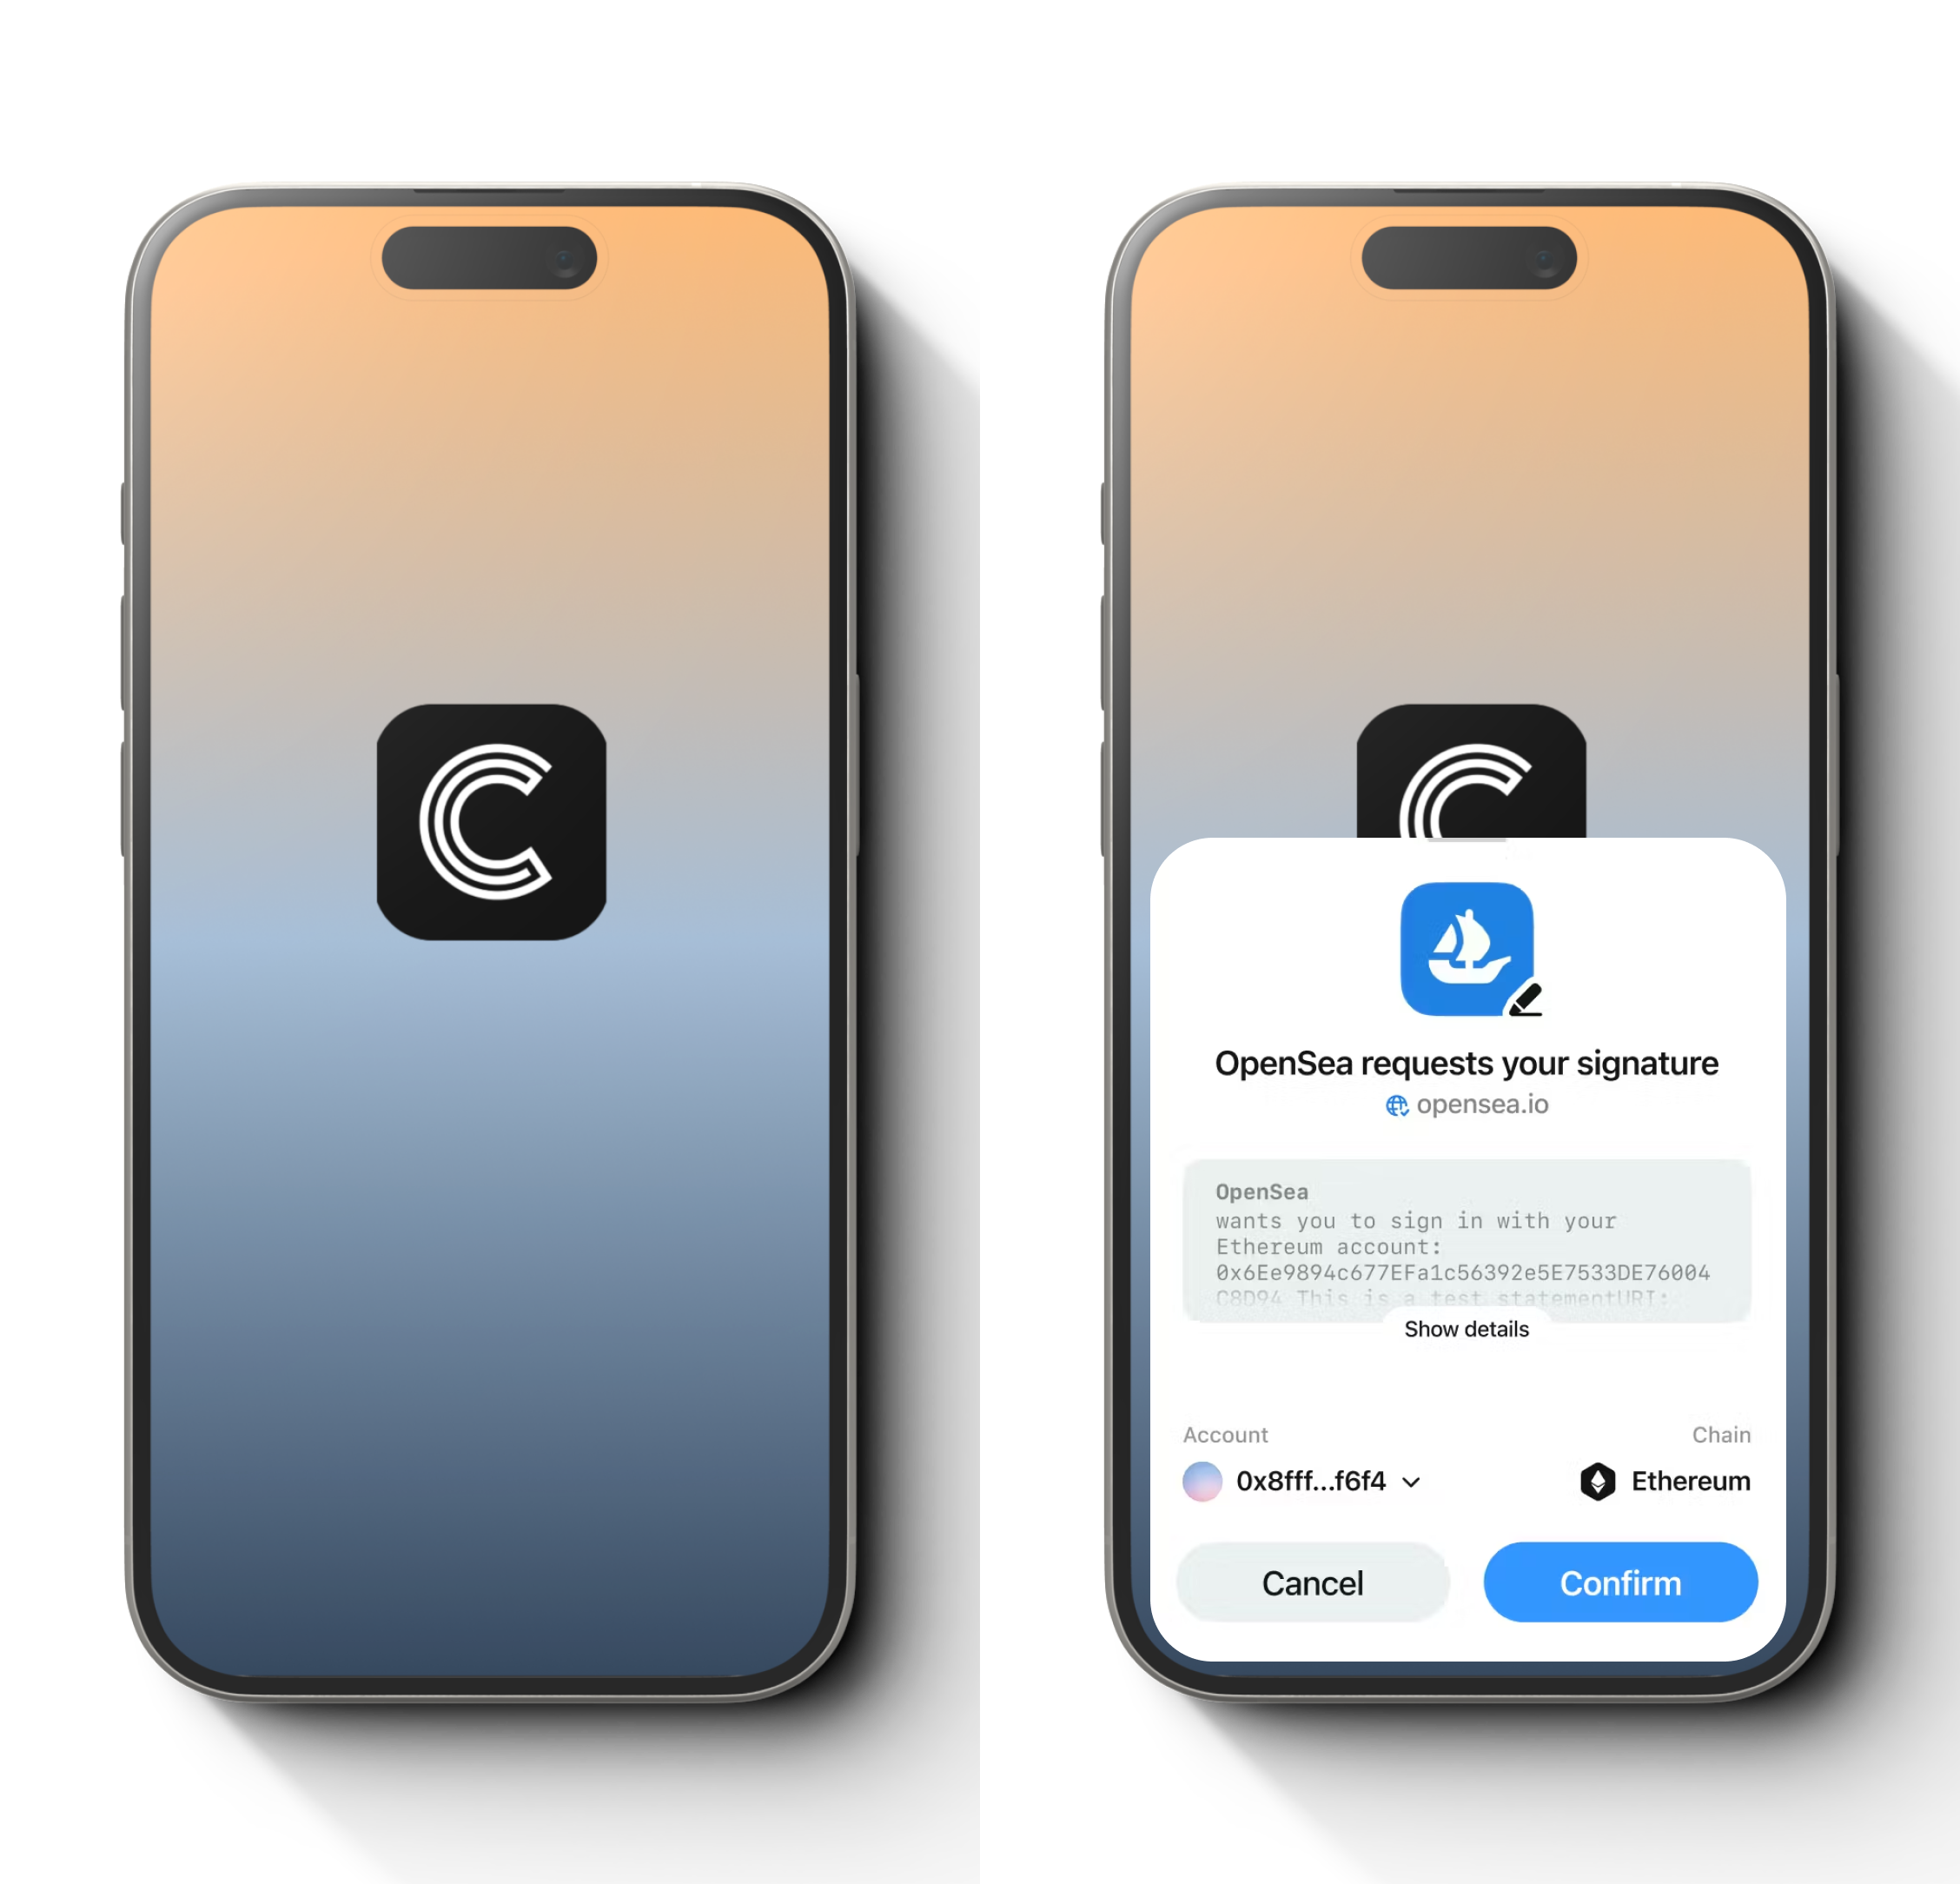
Download the Cryptnox application
Ensure that you have downloaded and installed the Cryptnox App on your device.
Launch the app to begin the initialization process.
Step 1
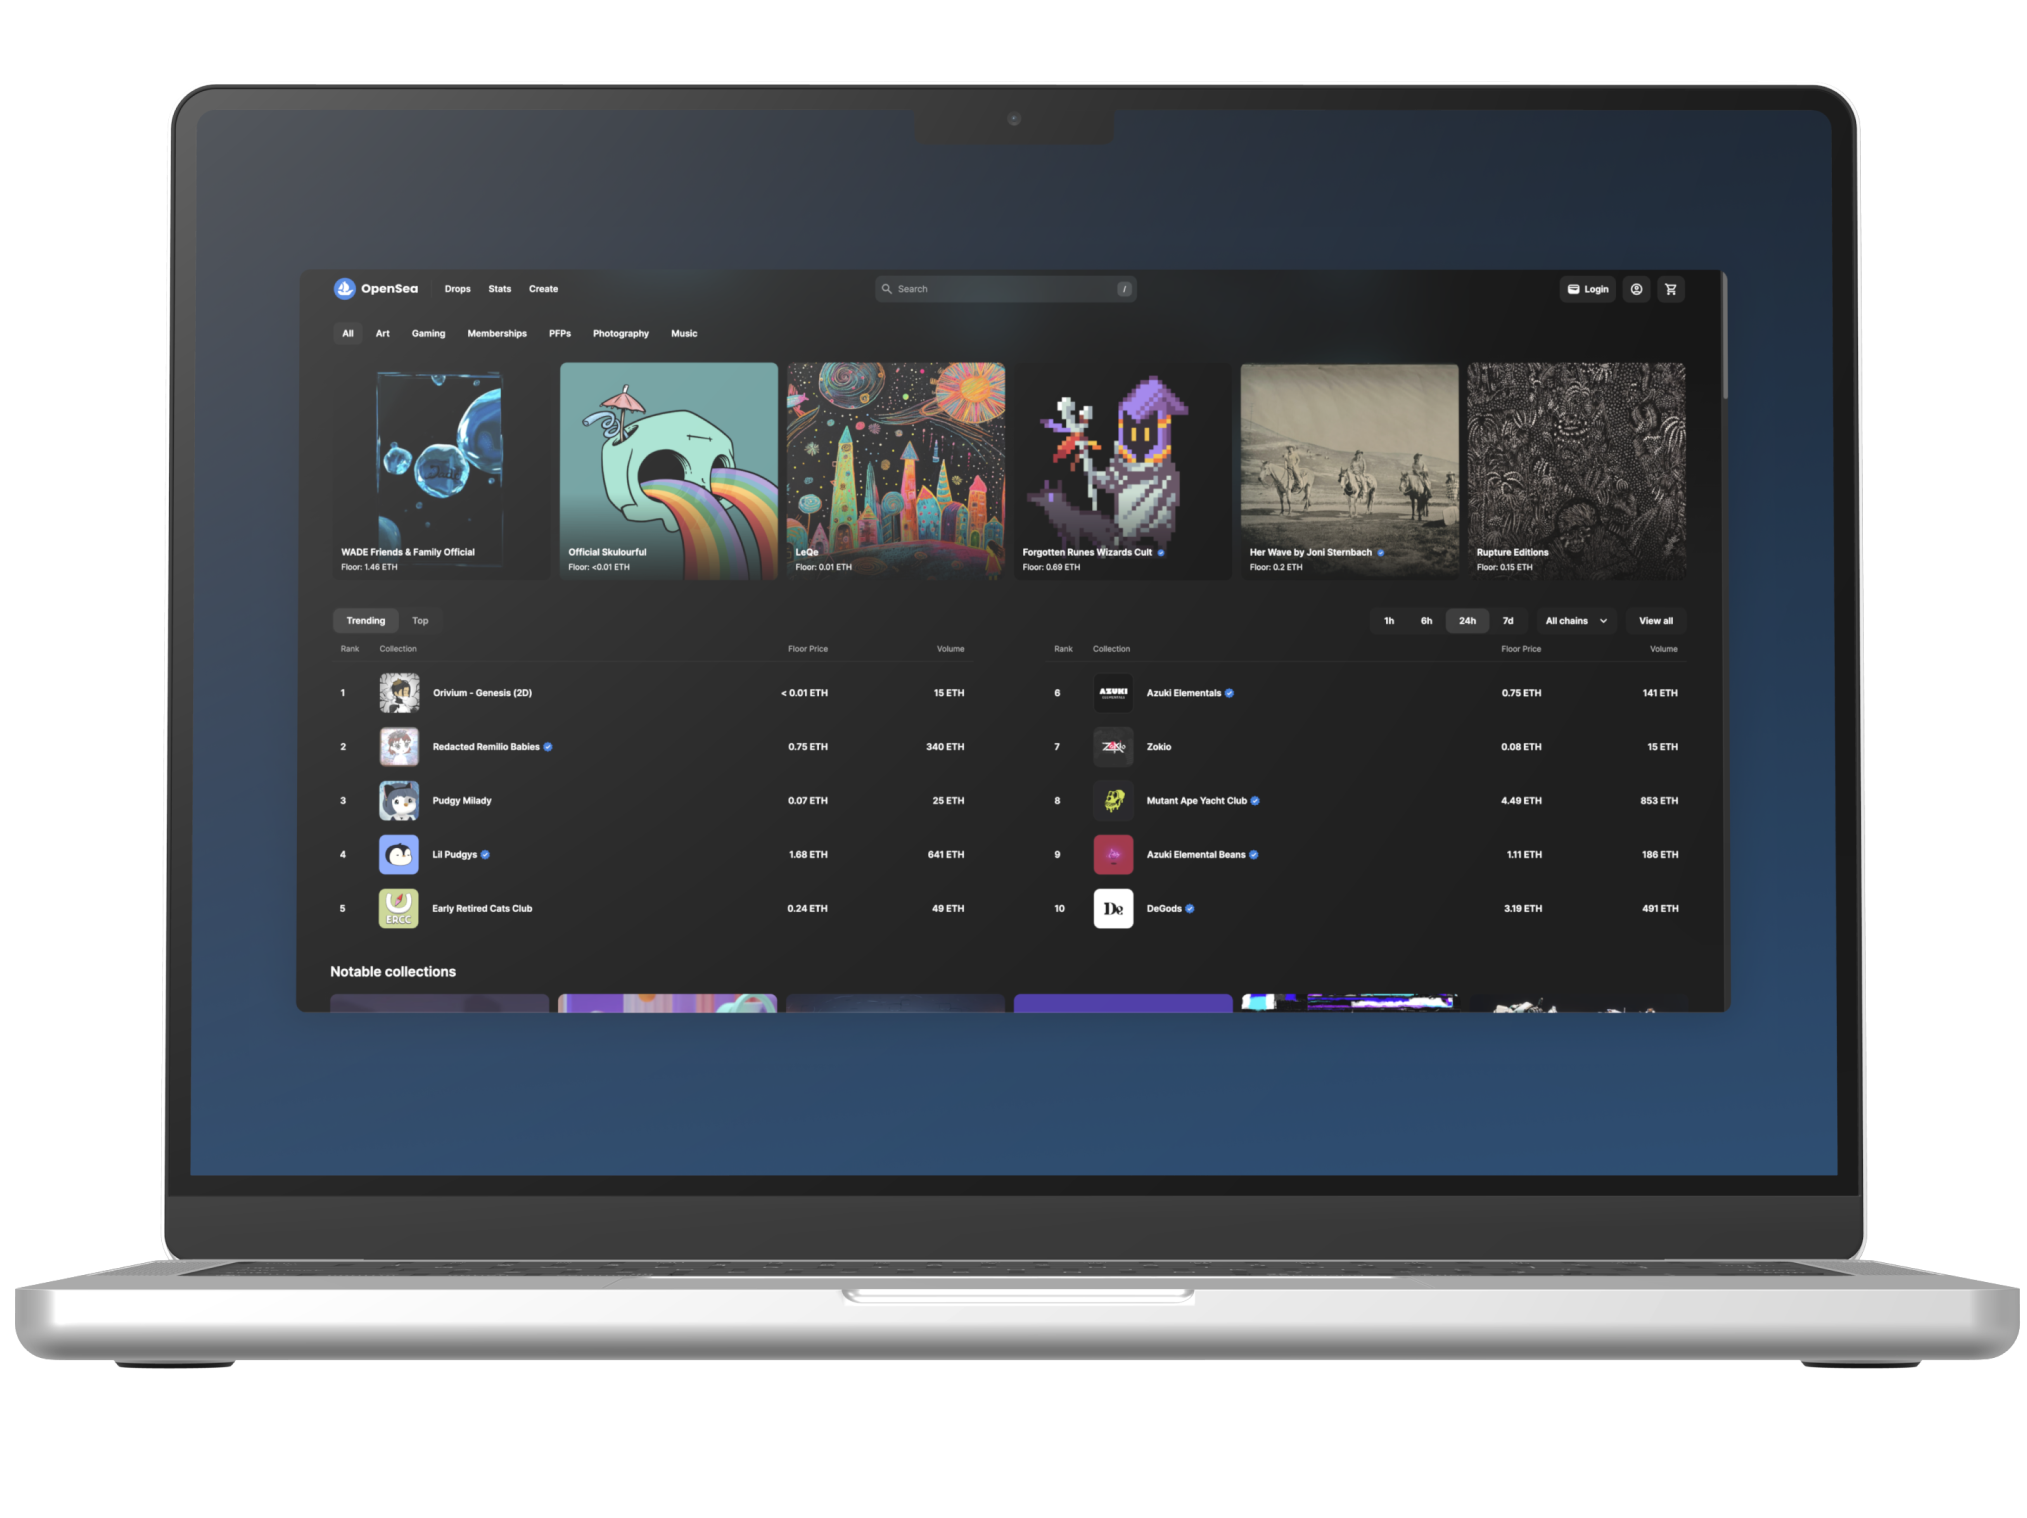
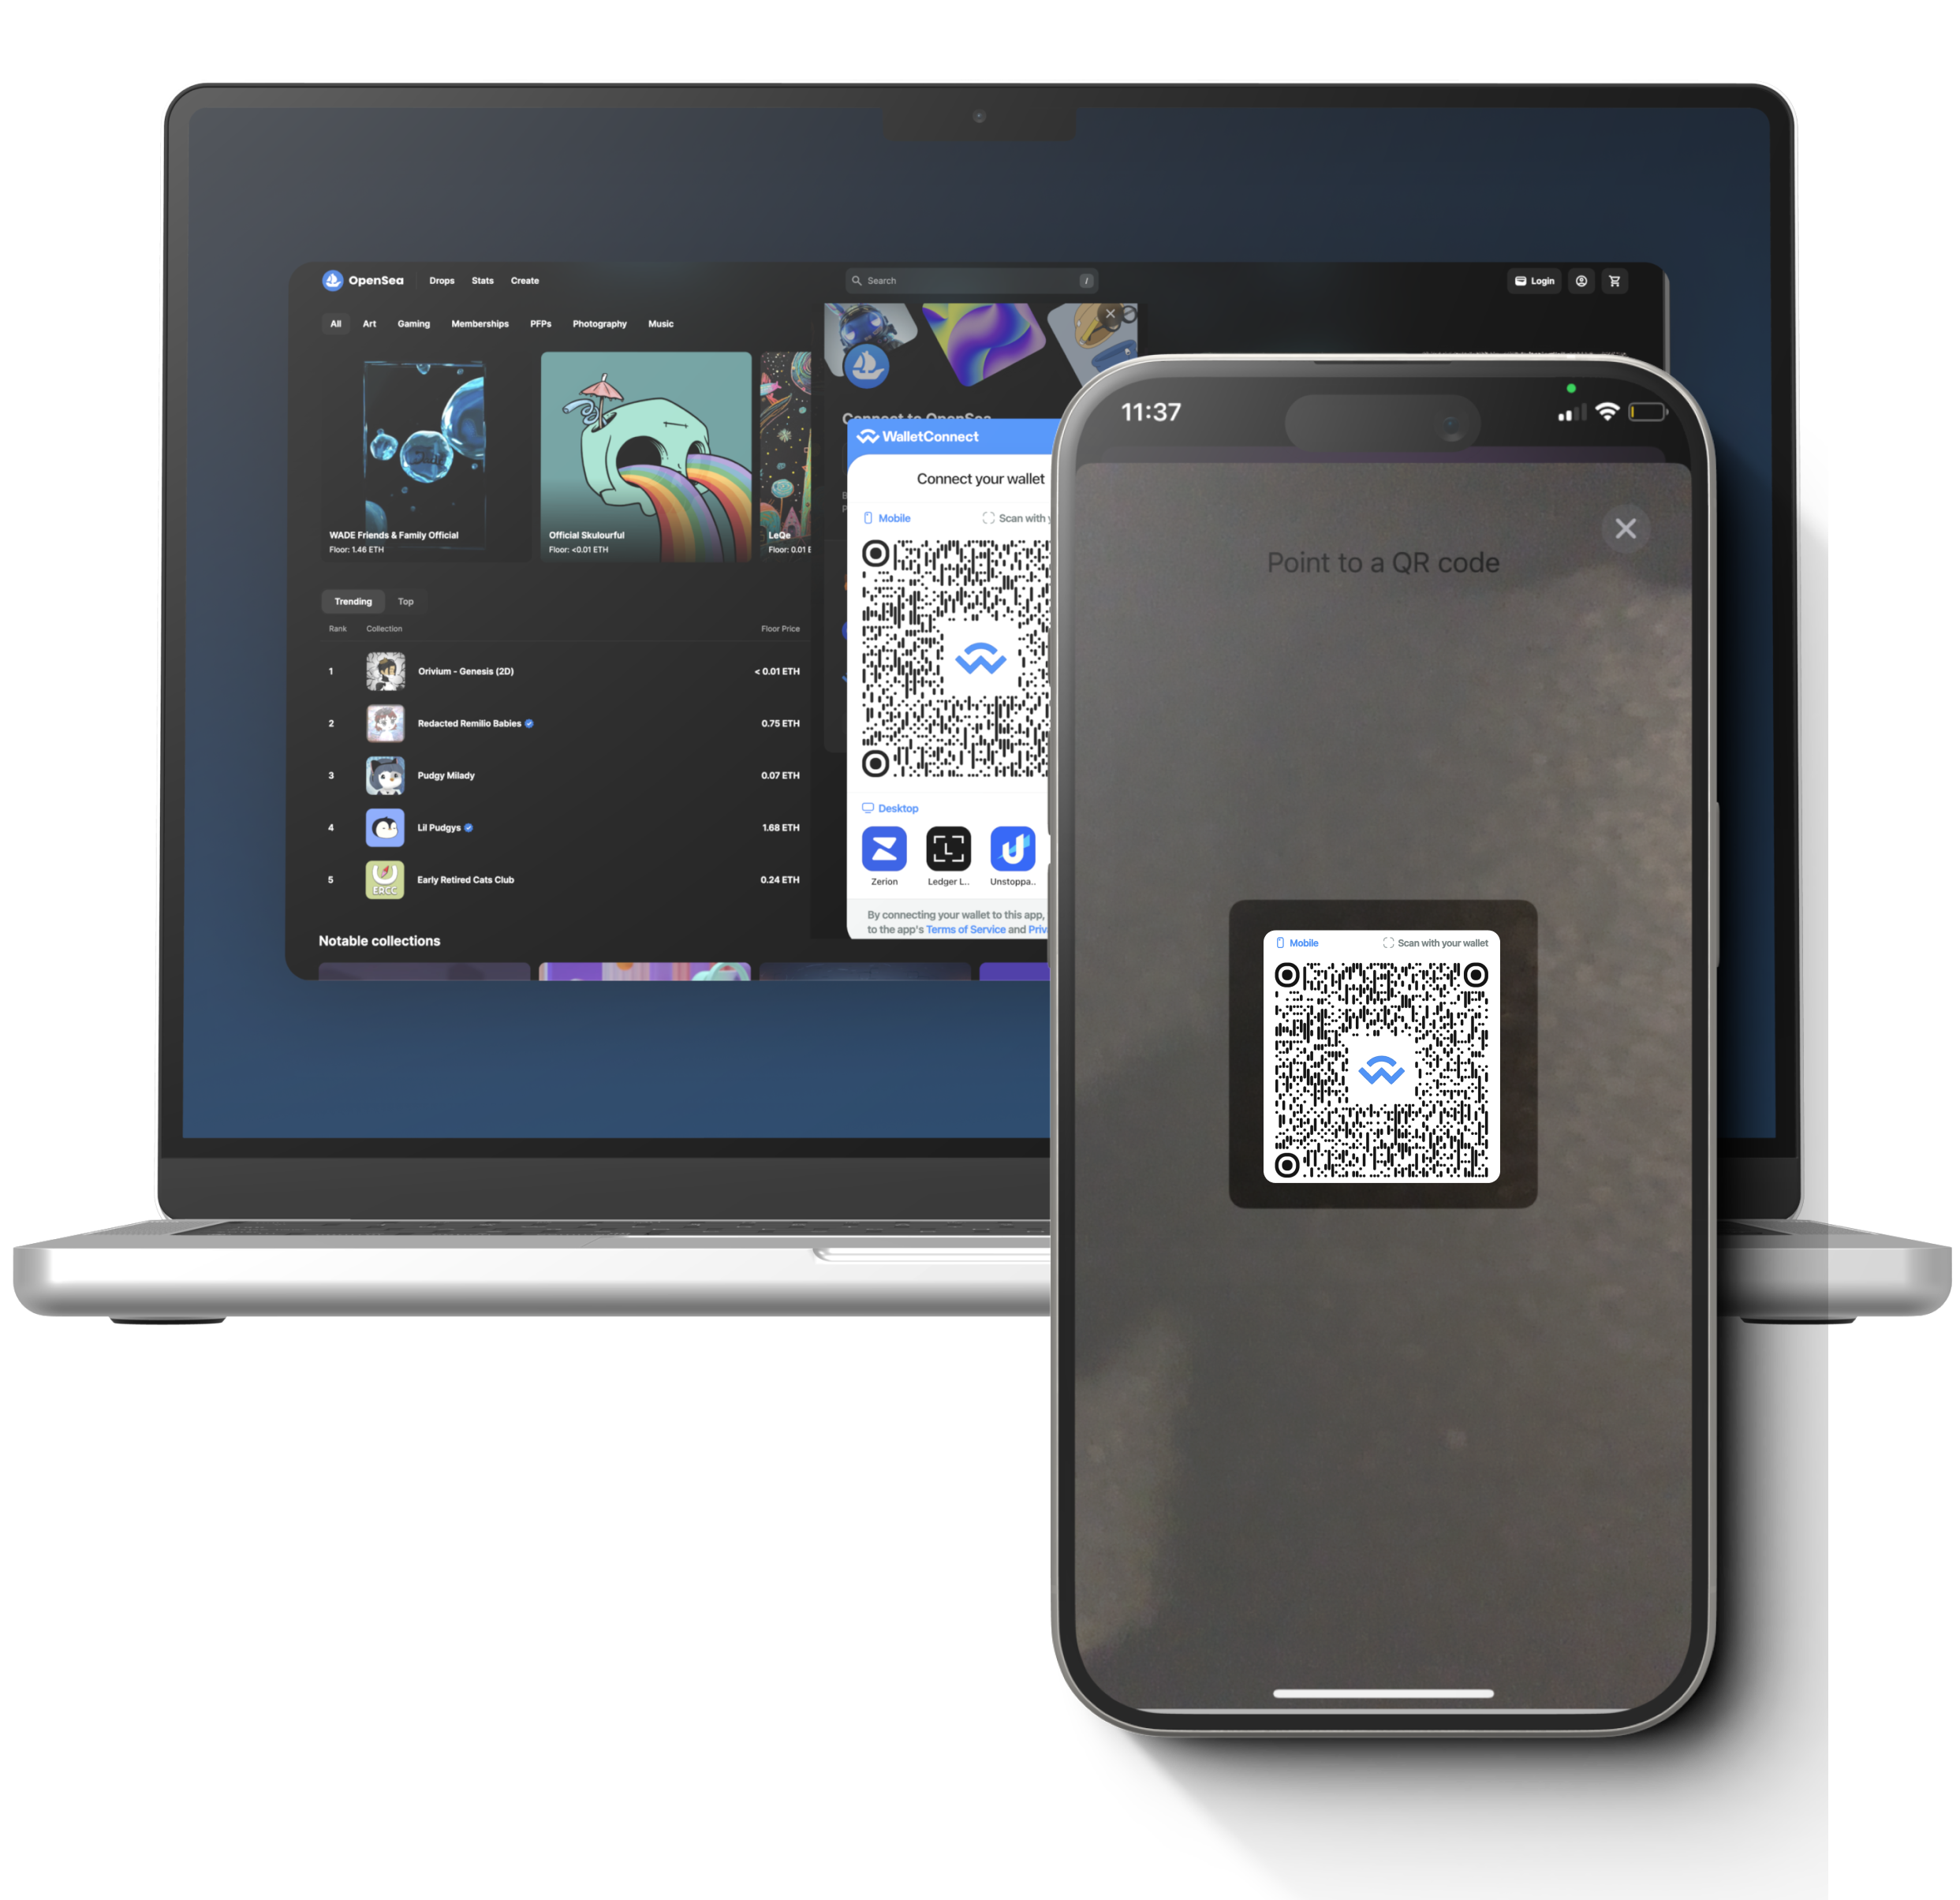
Go to the Web3 dapp website of your choice. In this example, we will connect your Cryptnox hardware wallet card to the Opensea NFT marketplace. Select “Login” to start connecting your wallet.
Note: On some other Web3 Dapp websites, instead of “Login” it can display “Connect” (Uniswap) or “Connect Wallet” (Polygon Portal).
Step 2
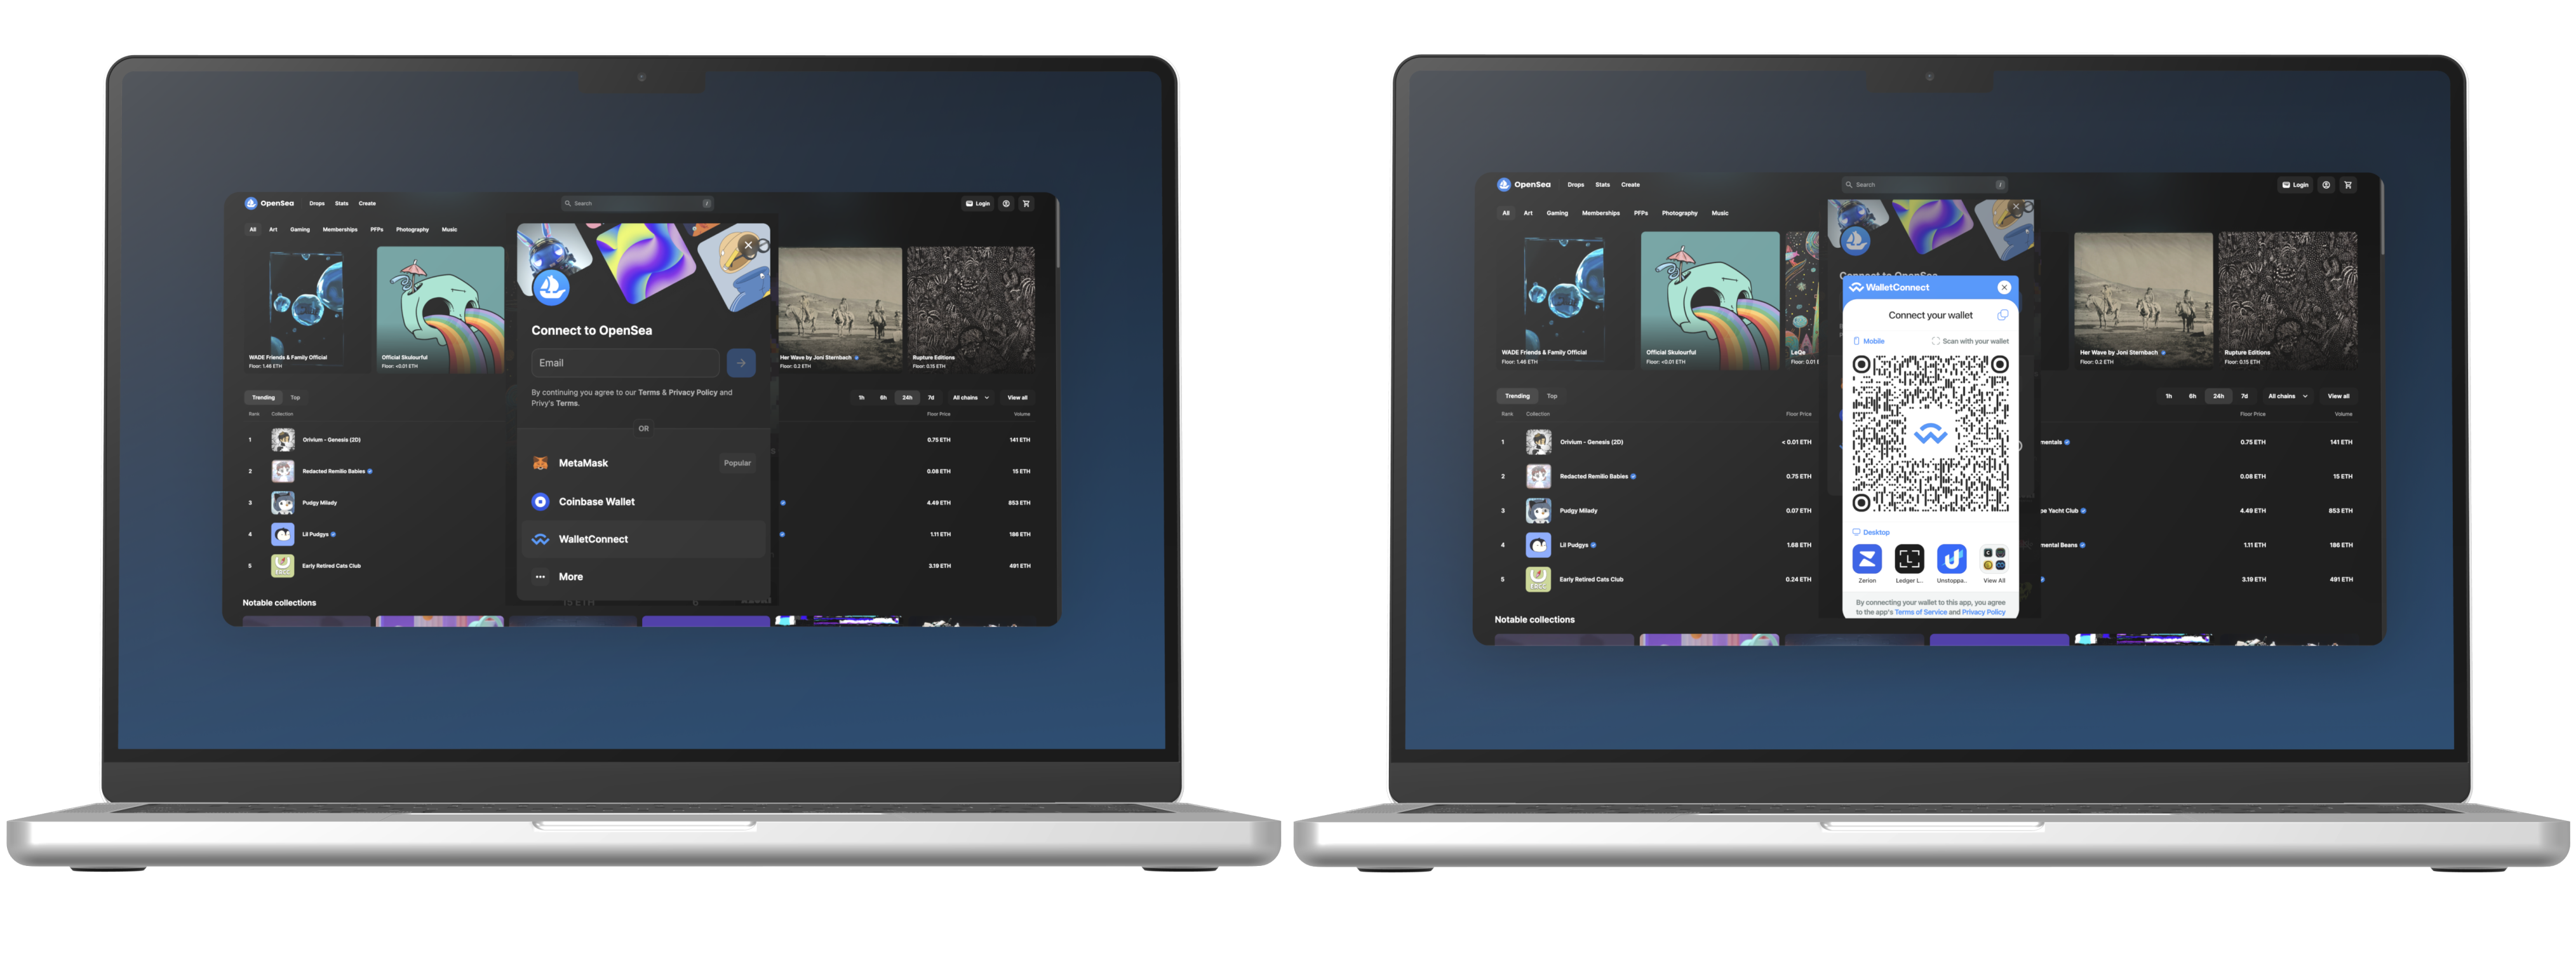
In the list of options, select “WalletConnect” and you will see the QR code to scan from phone.
Step 3
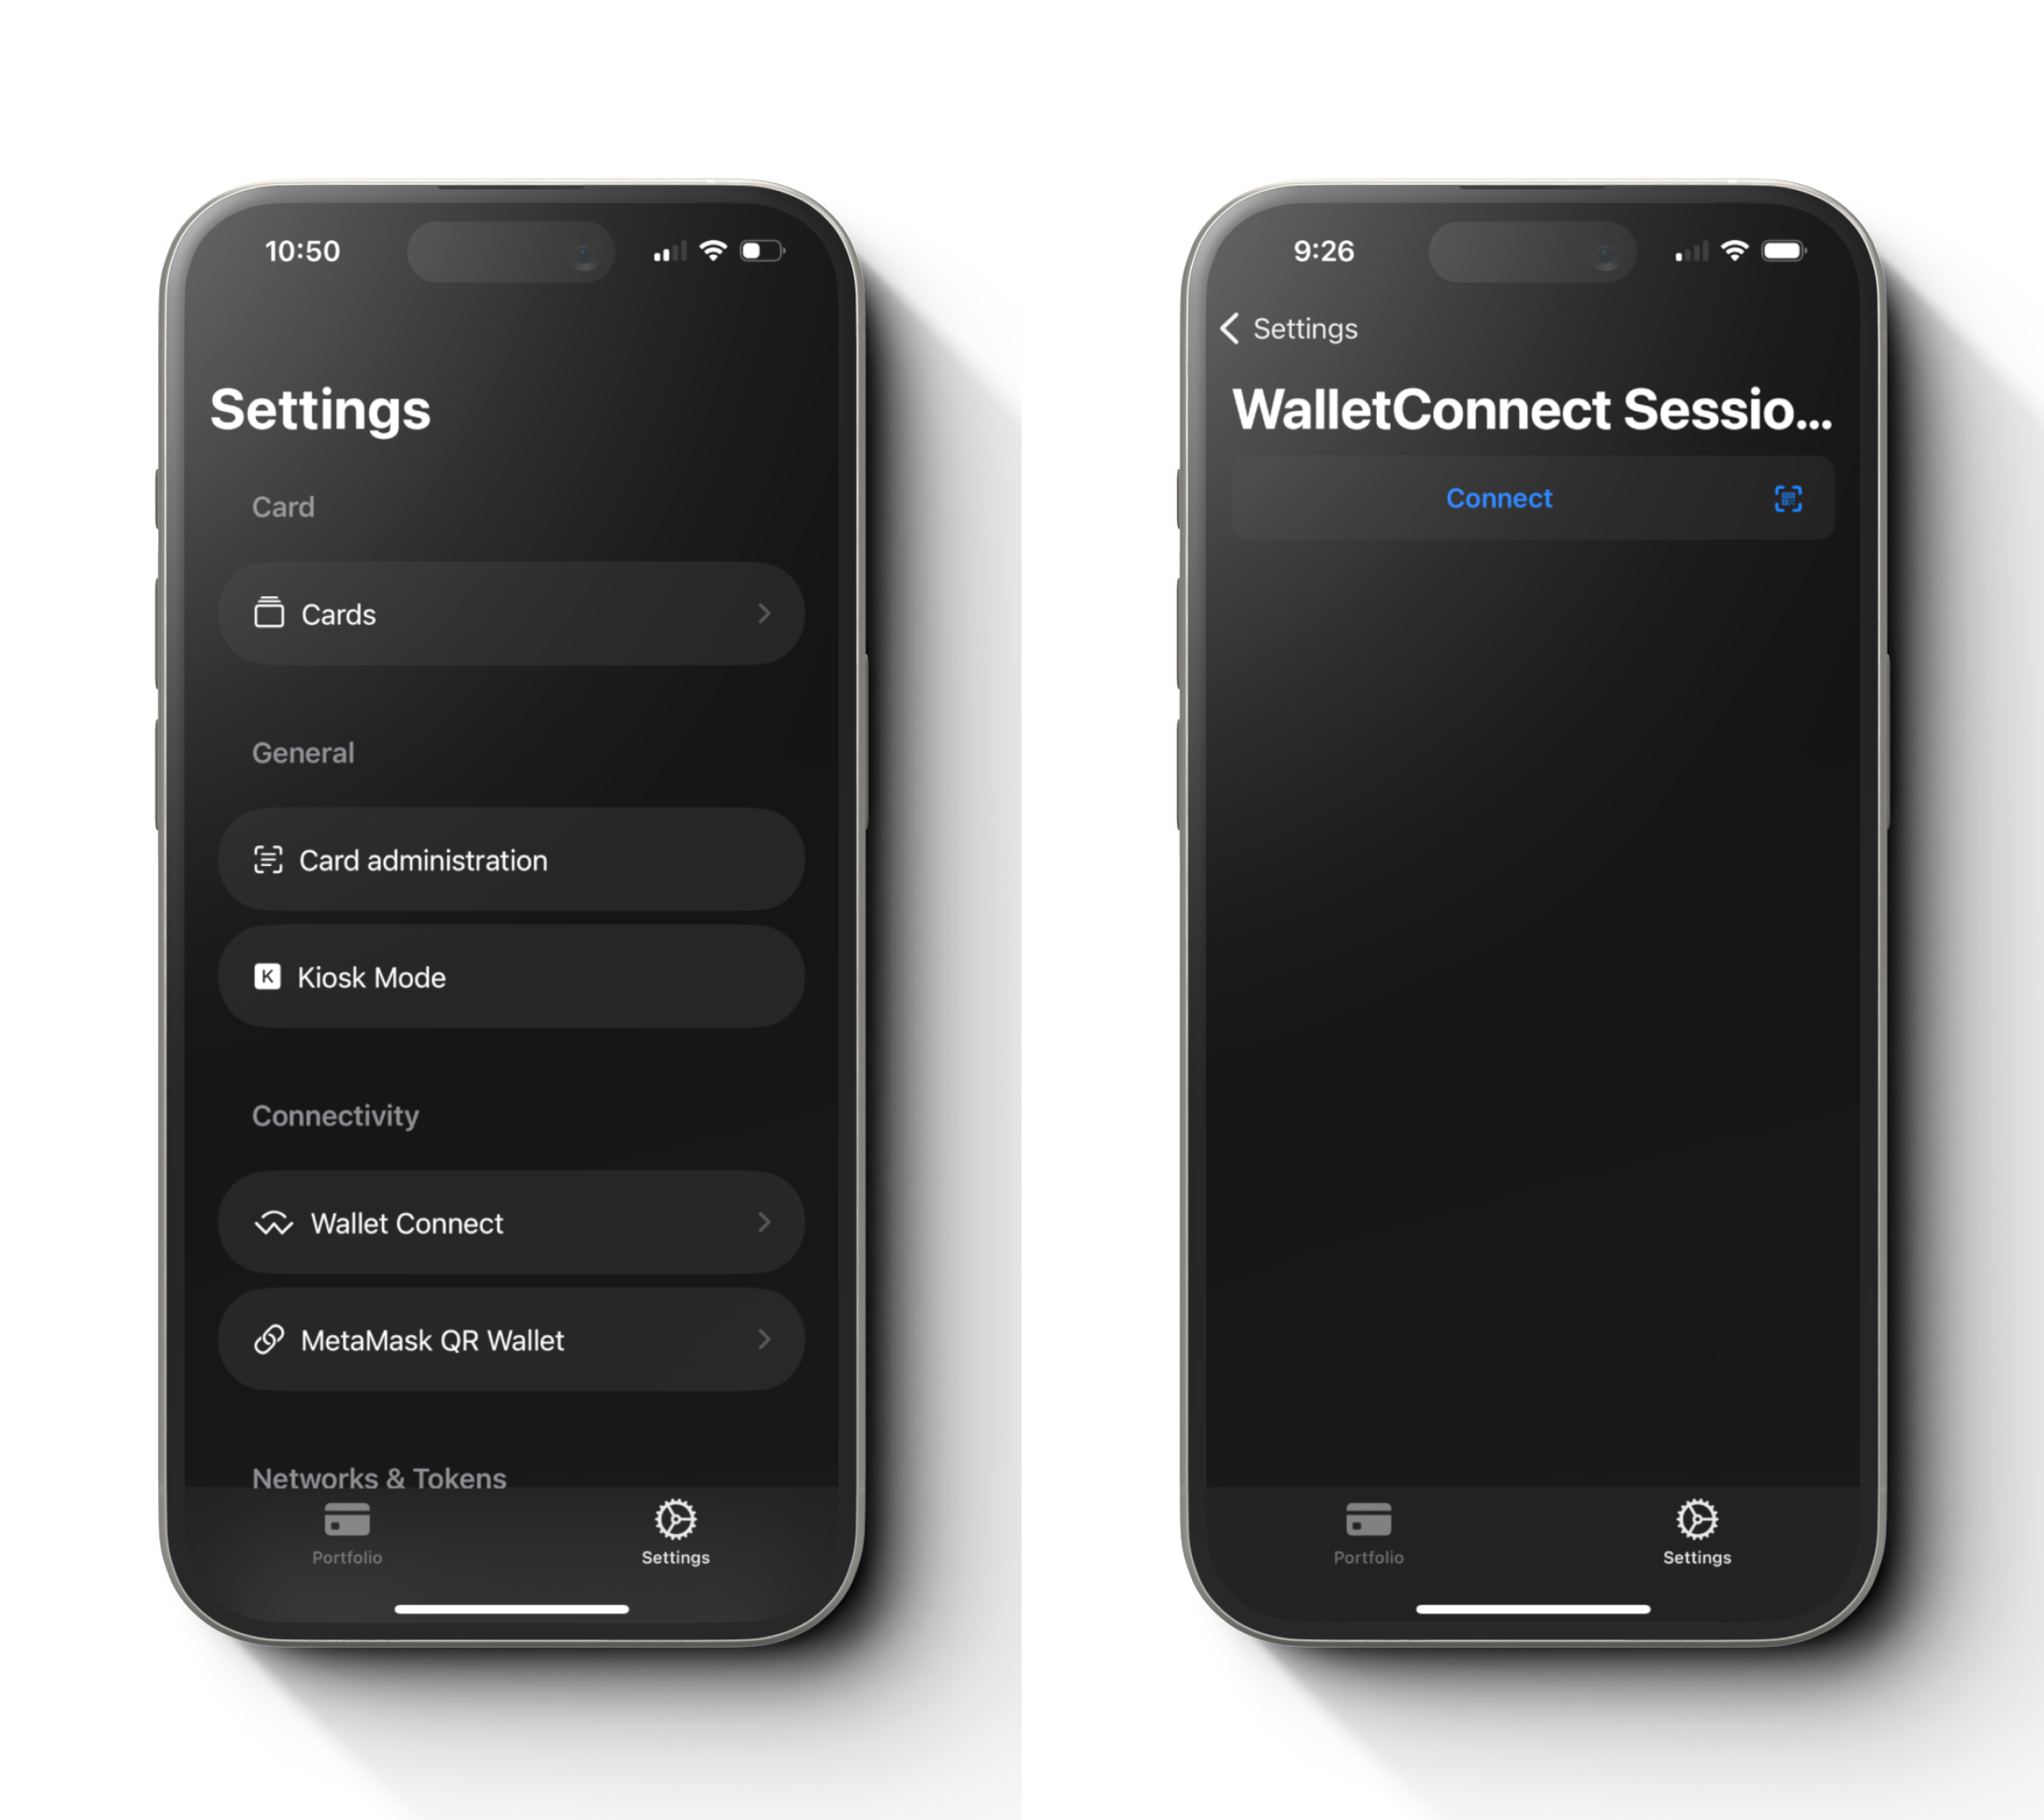
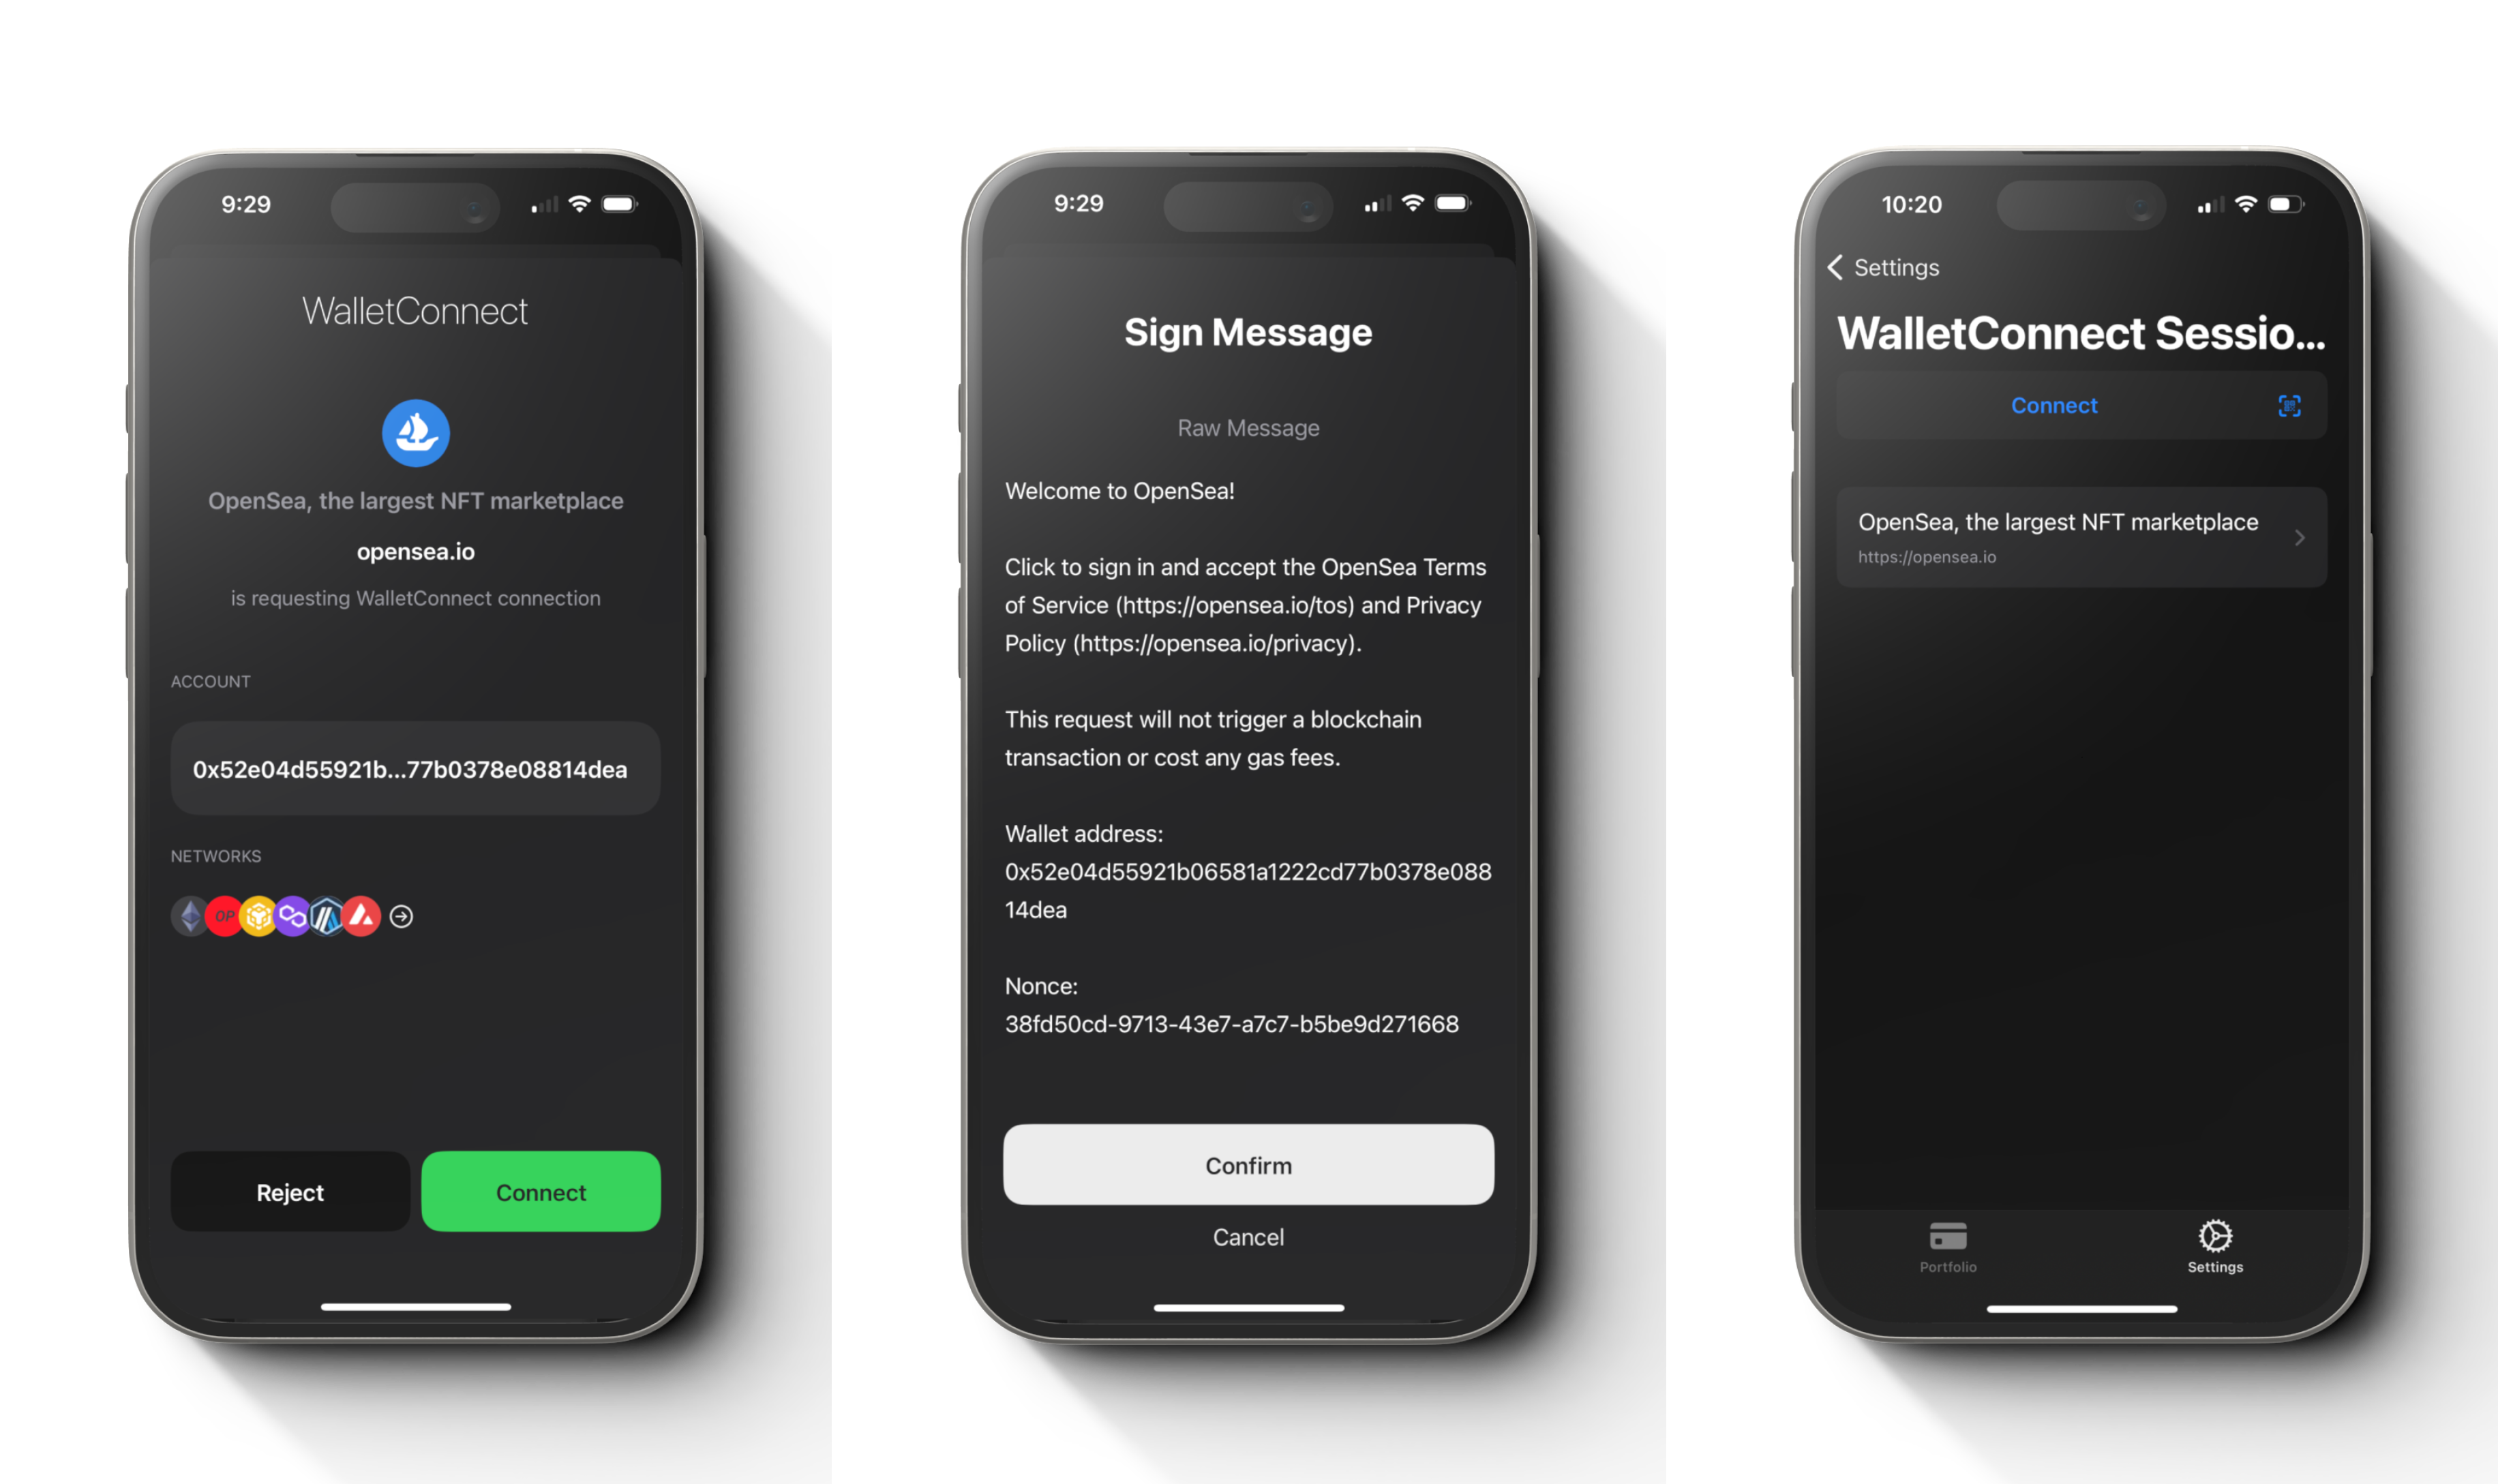
In the Cryptnox Wallet App, go to settings and select “WalletConnect”.
Then press “Connect” button and scan the QR code from the website.
Step 4
You will get to the screen with detail informations to link with WalletConnect. Press “Connect” and then “Confirm” in the next screen. After that you will see an option to select in the list.
Step 5
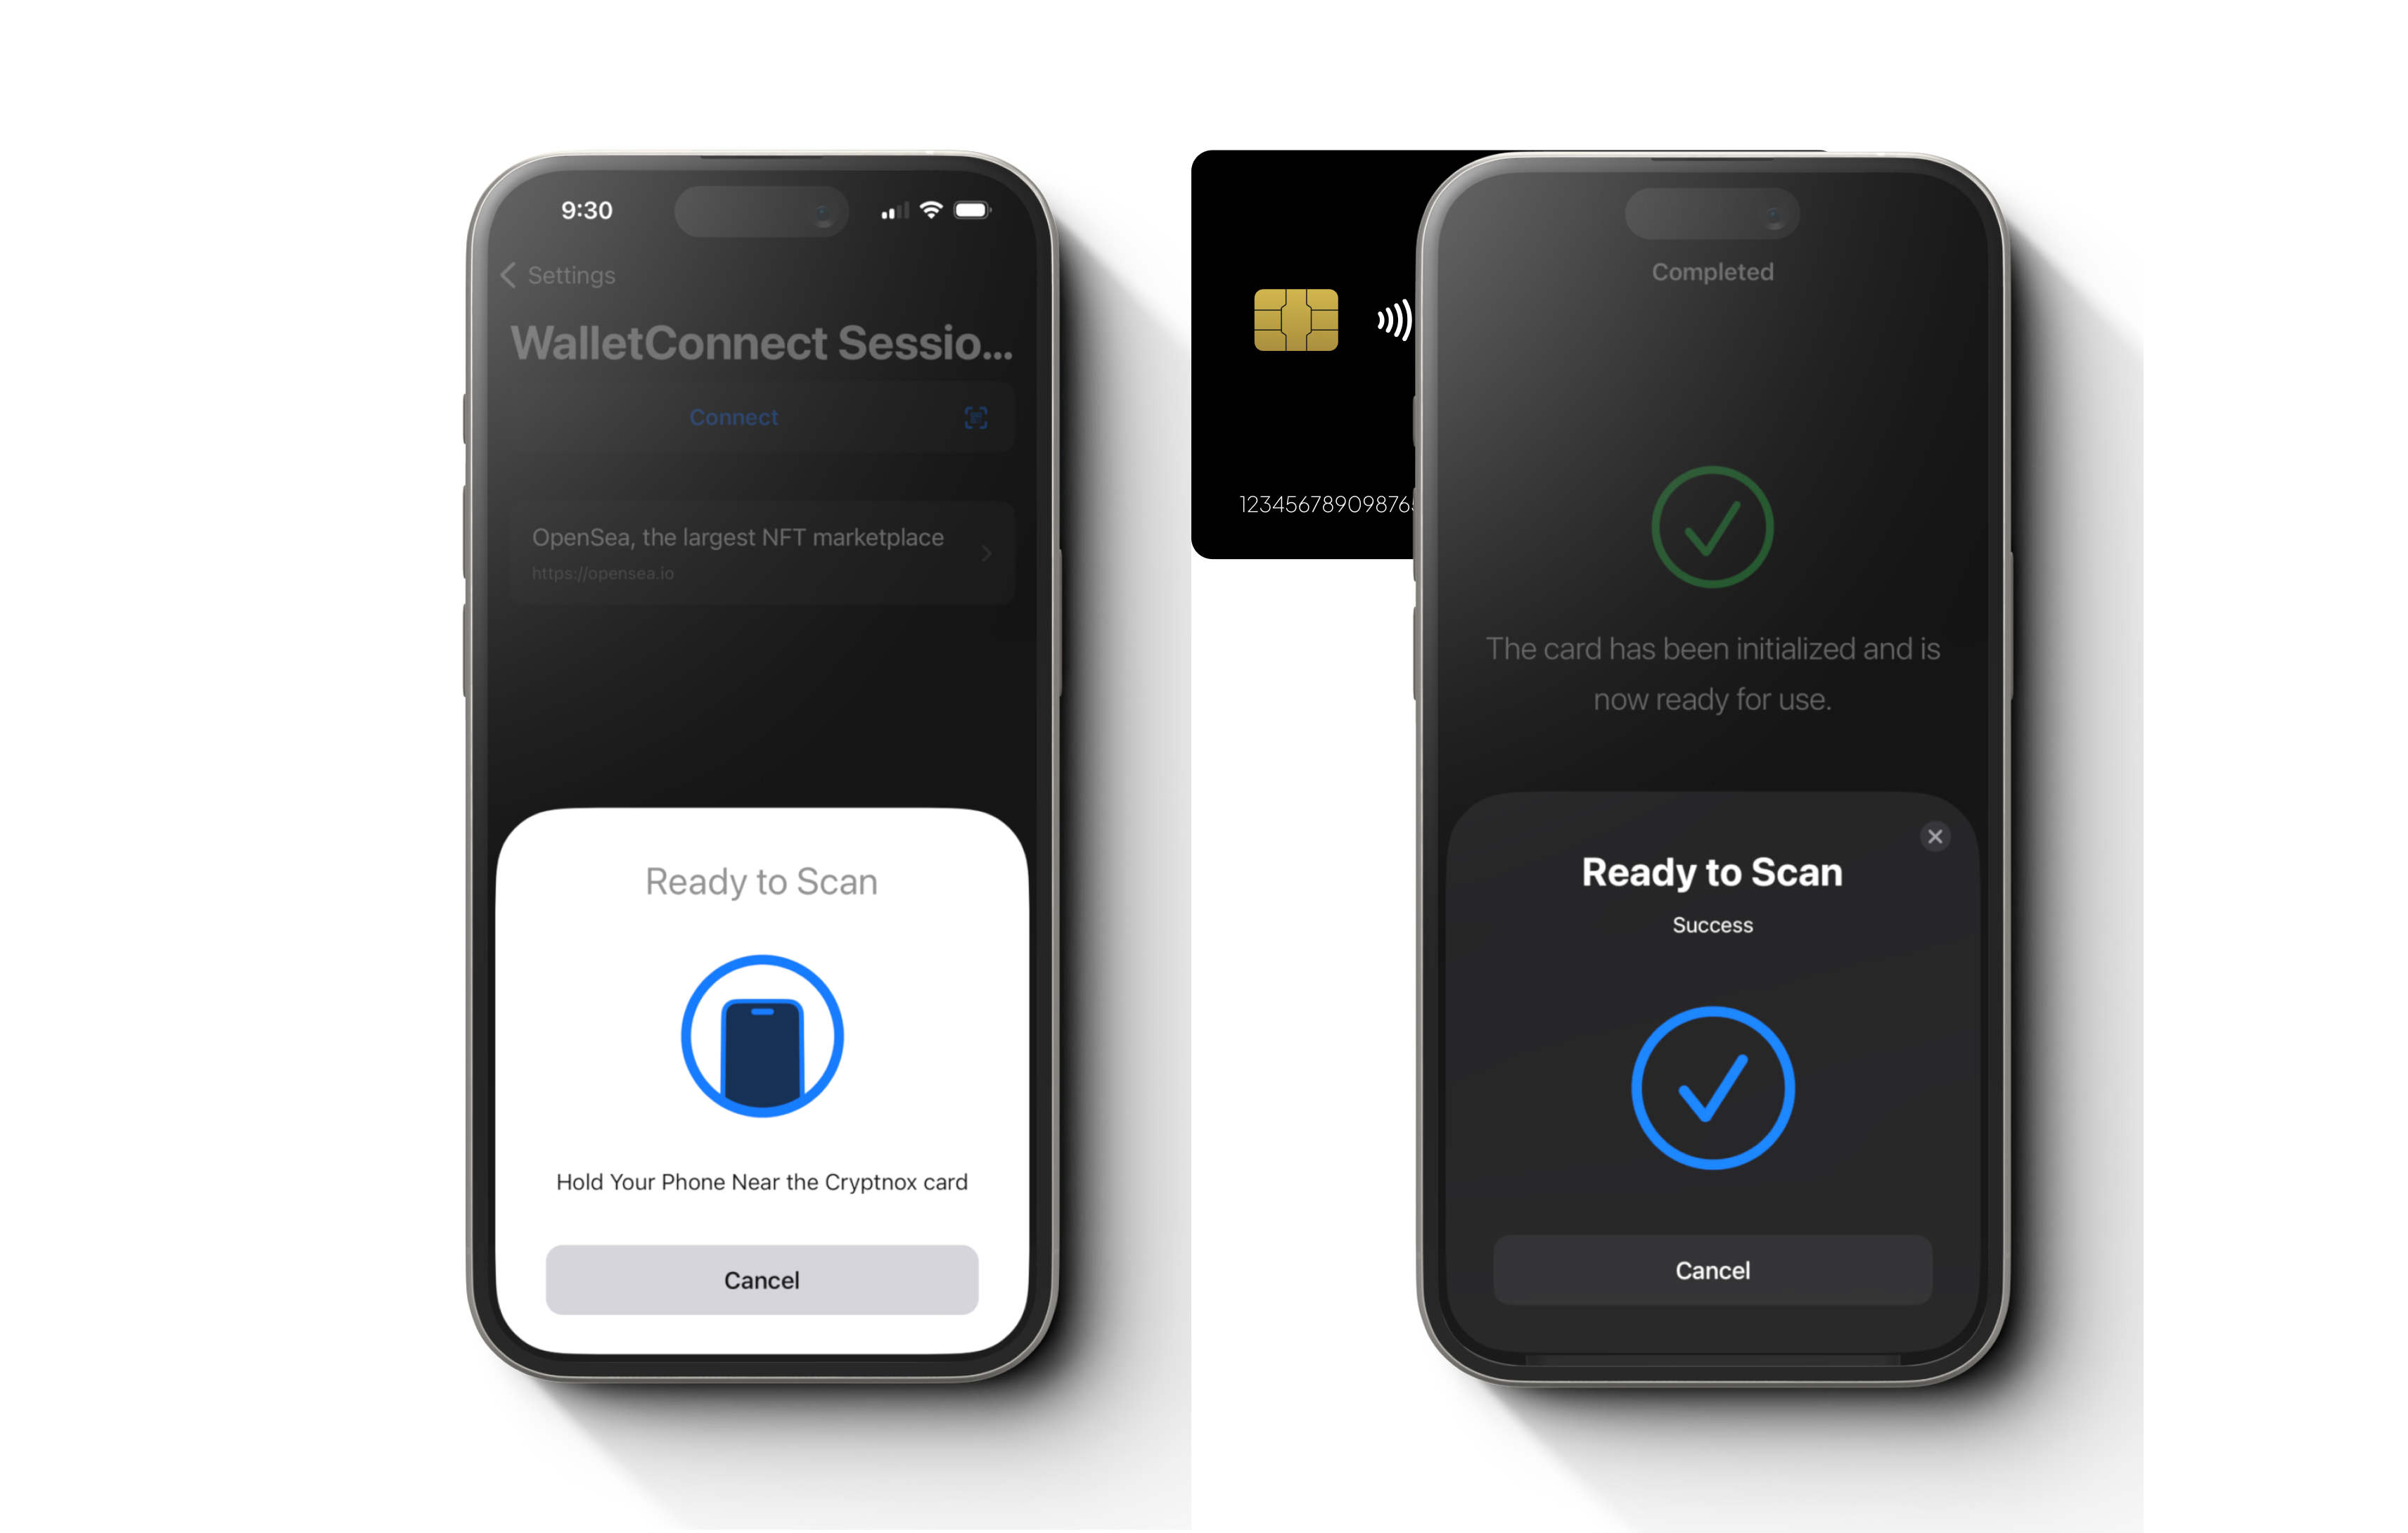
Select on the list and scan your Cryptnox hardware wallet card to your phone when prompted. Then go back to website that you are using to connect.
Step 6
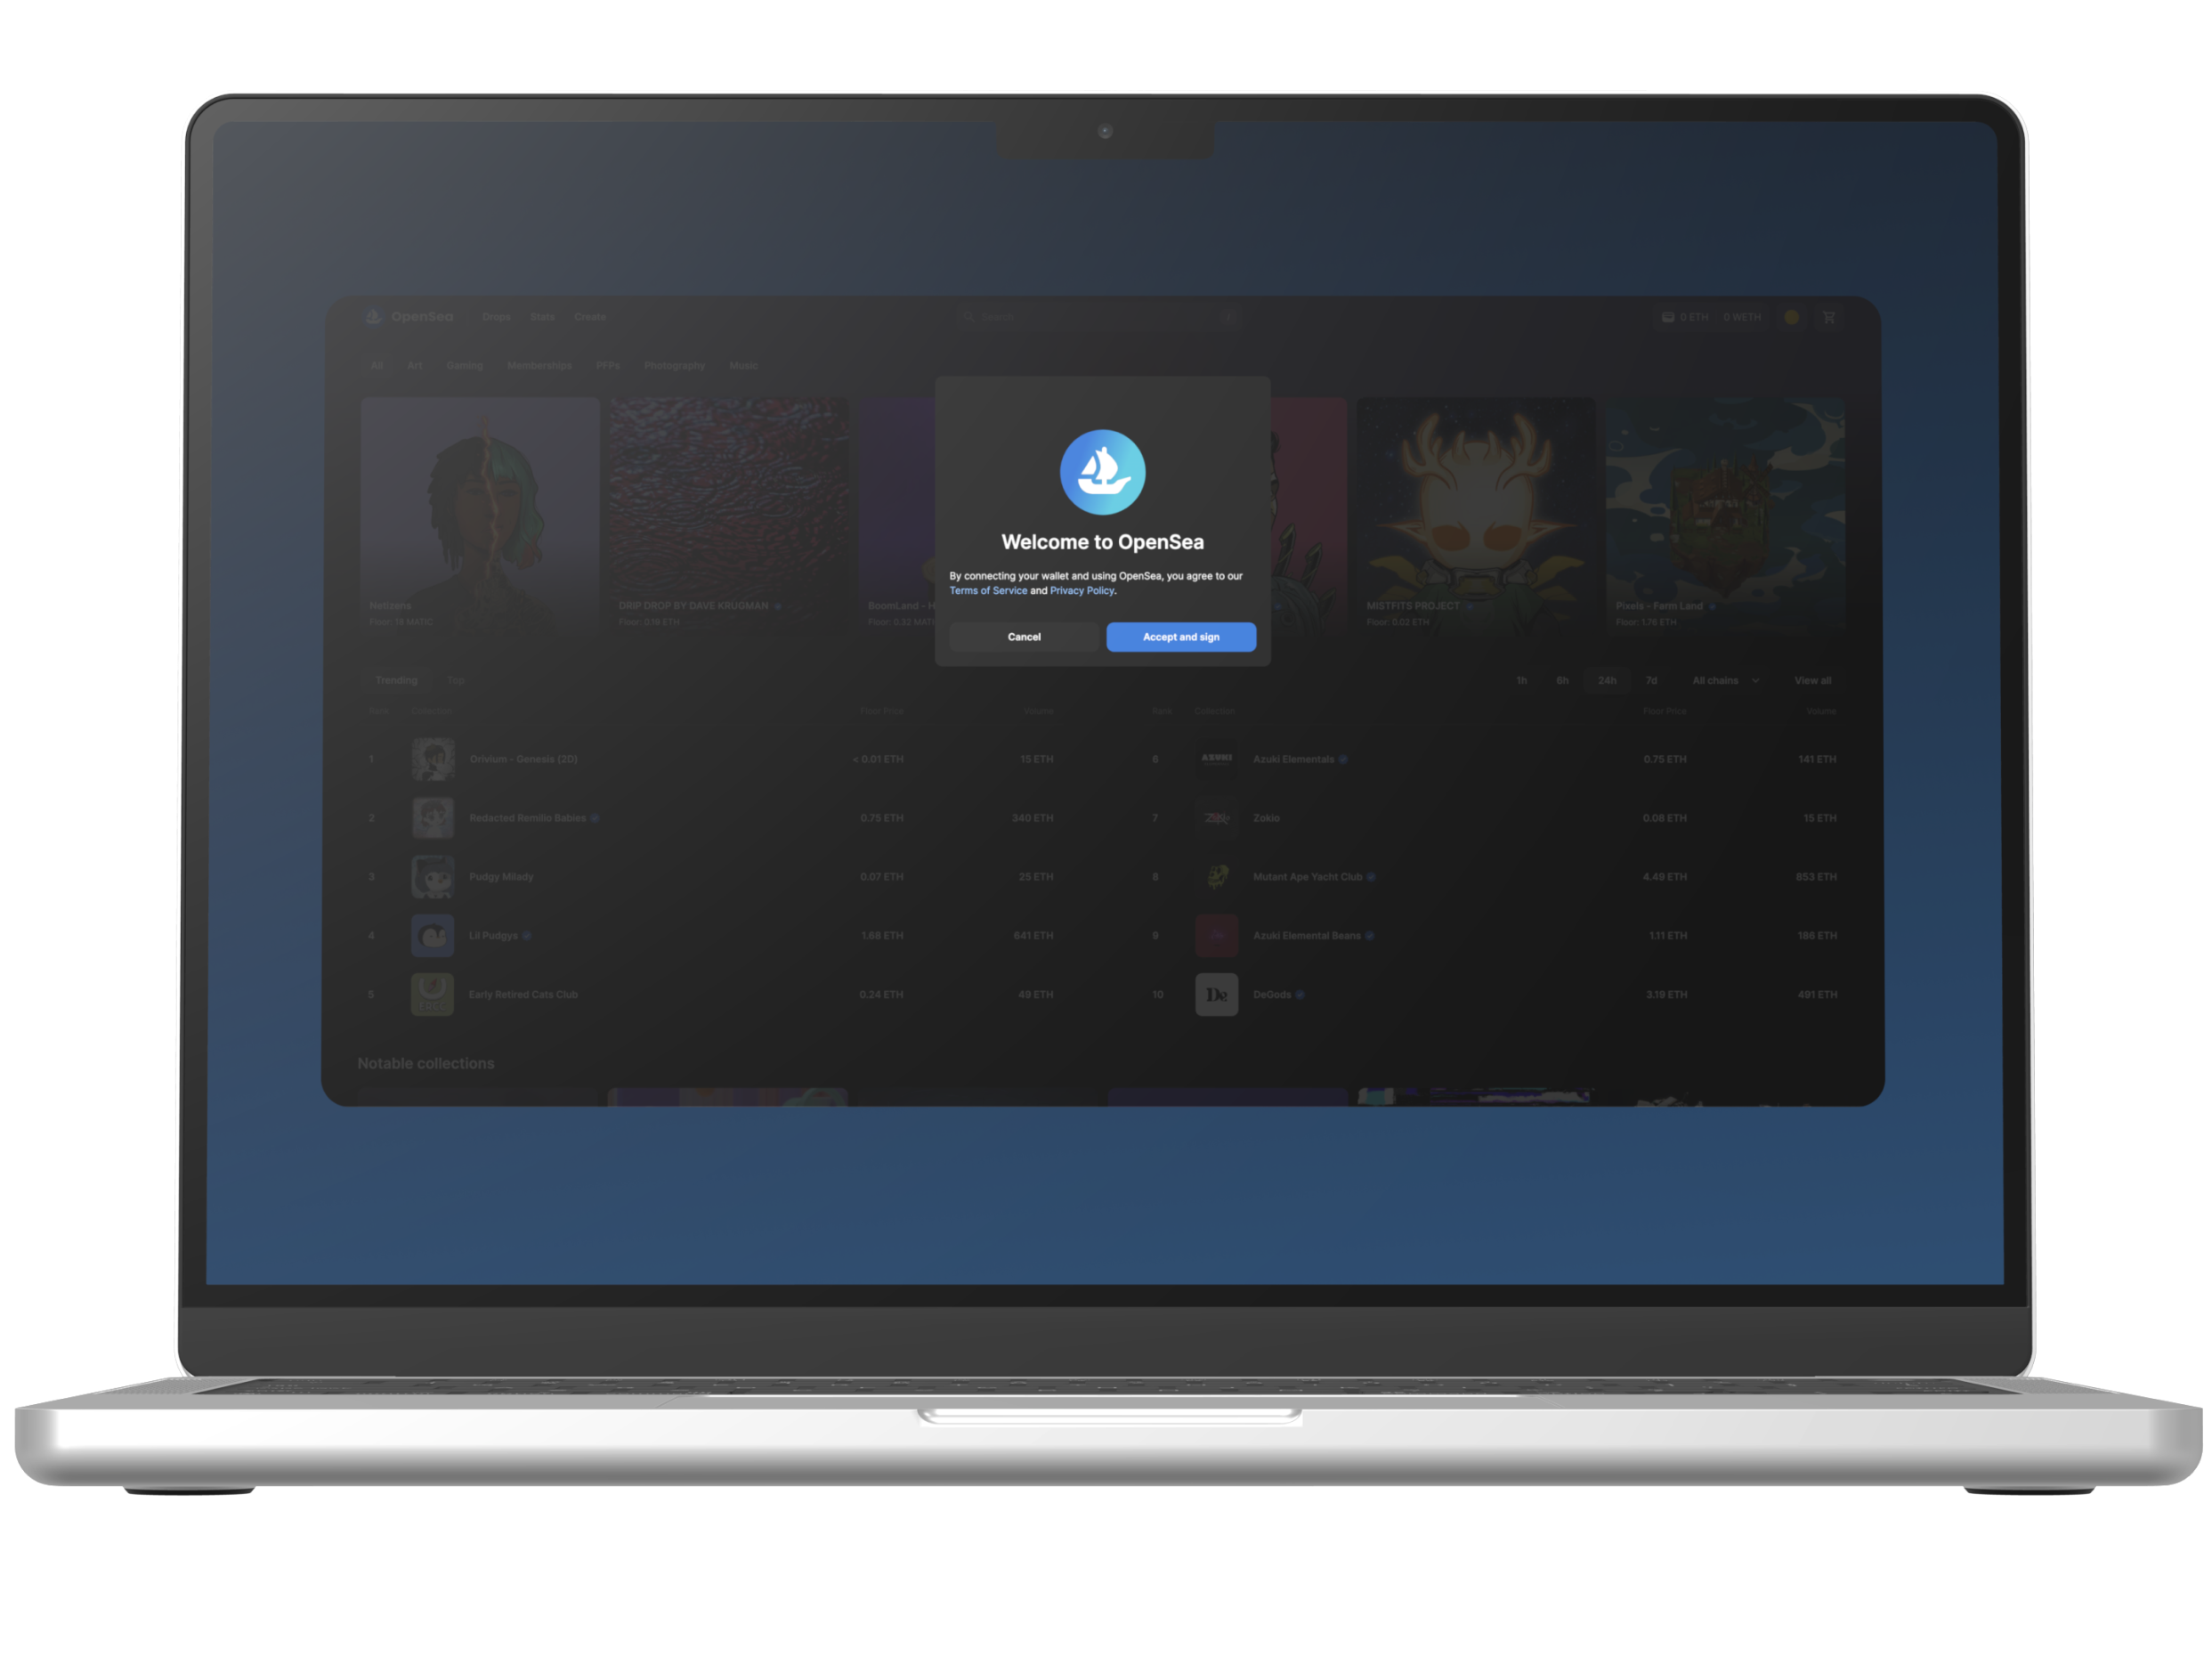
On the website, select “Accept and sign”.
Congratulations ! Here you have successfully linked your Cryptnox hardware wallet card to the Web3 Opensea NFT marketplace using WalletConnect and the Cryptnox Wallet mobile application.
Note: Each time you are required to sign a transaction on the site, the Cryptnox Wallet mobile application will prompt you to scan your Cryptnox hardware wallet card on your phone.
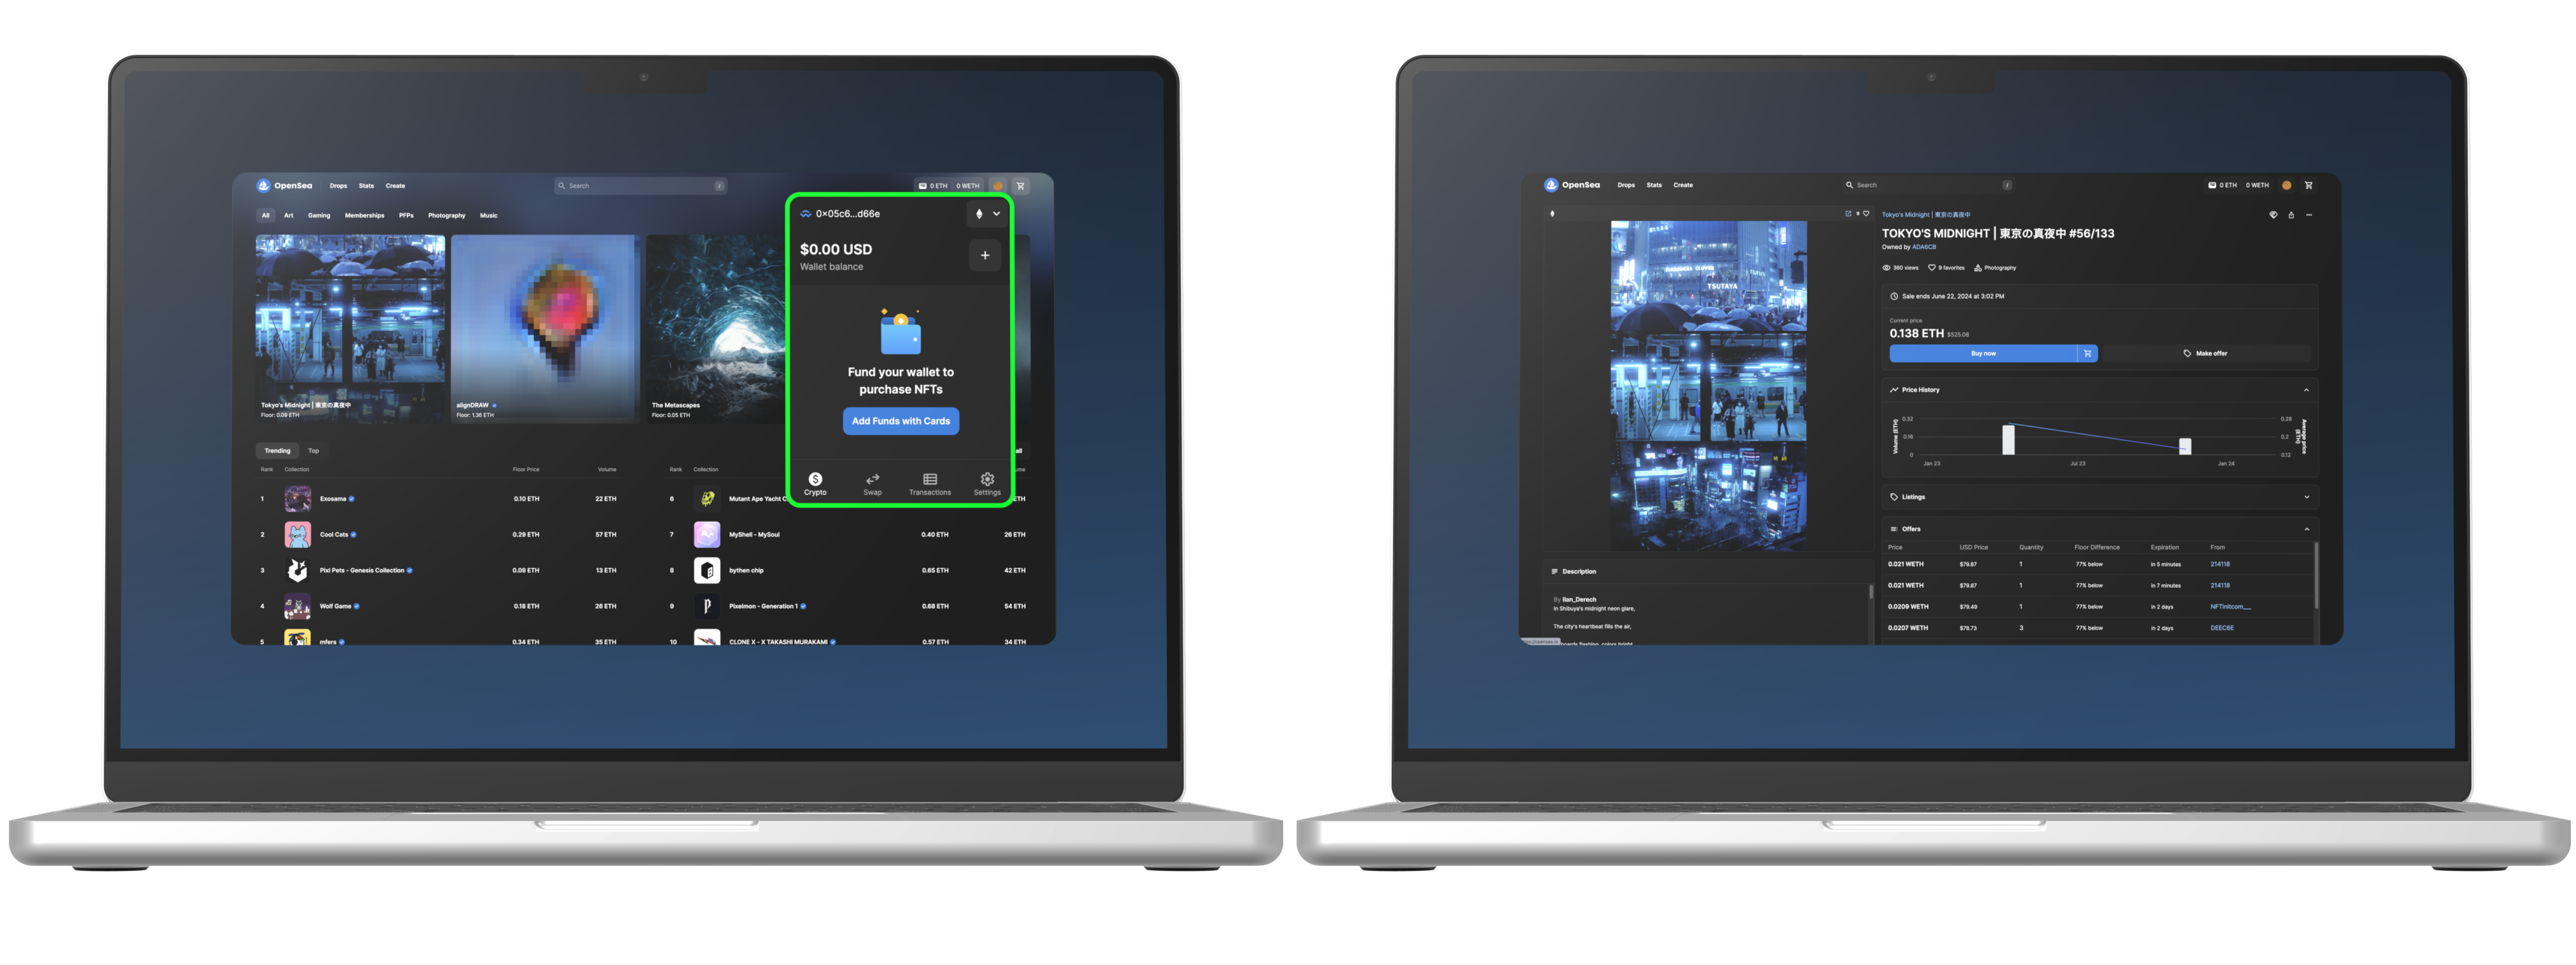
Step 7
Your Ethereum public address will be displayed as your connected account.
You can now make a transaction as you may.