Passkey Support Across Operating Systems and Web Browsers:
The availability of passkey support can vary based on the operating system and web browser being used. MacOS: Passkey support is provided by browsers such as Safari and Firefox. Windows: Most web browsers offer passkey support. On mobile: It’s recommended to use the mobile web version of the service, as almost every application directs users to the web version within a mobile browser for the setup process.
Before you start
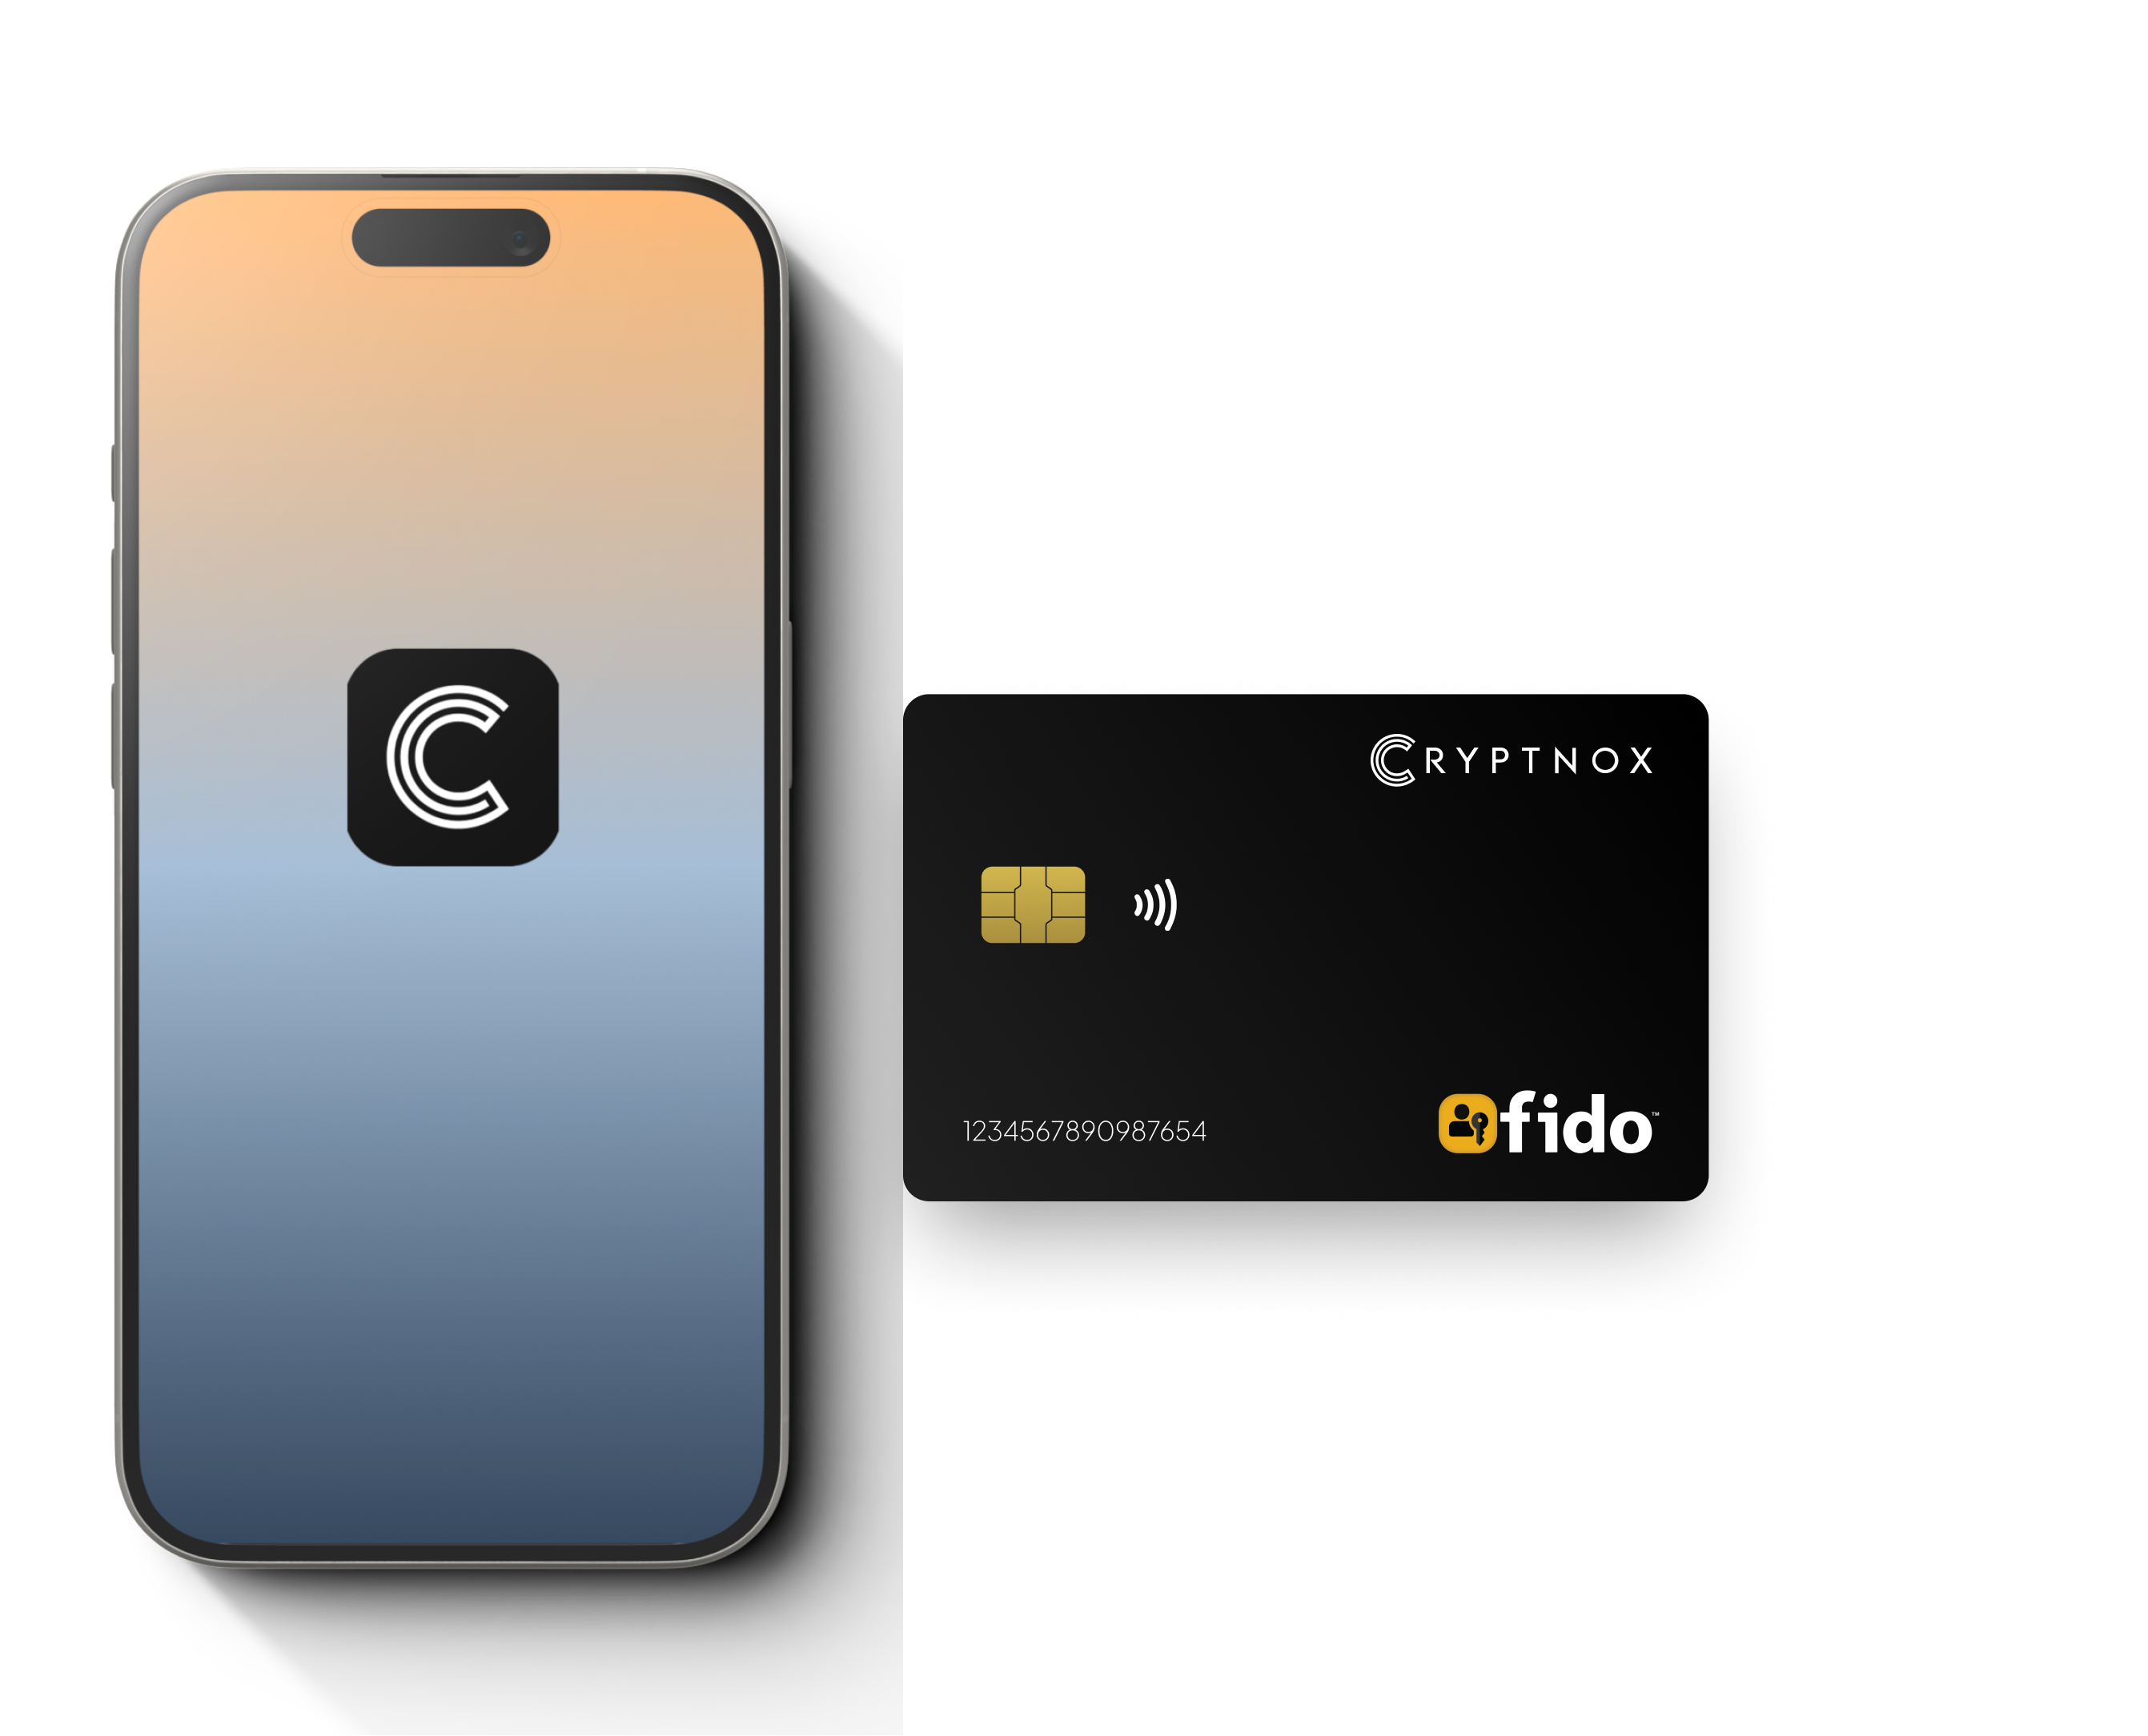
Ensure that you have an iPhone and a minimum of two FIDO2 Cards available for the setup. For official Apple tutorial, click here.
Note: Setting security key for iOS requires two FIDO2 cards.
Step 1
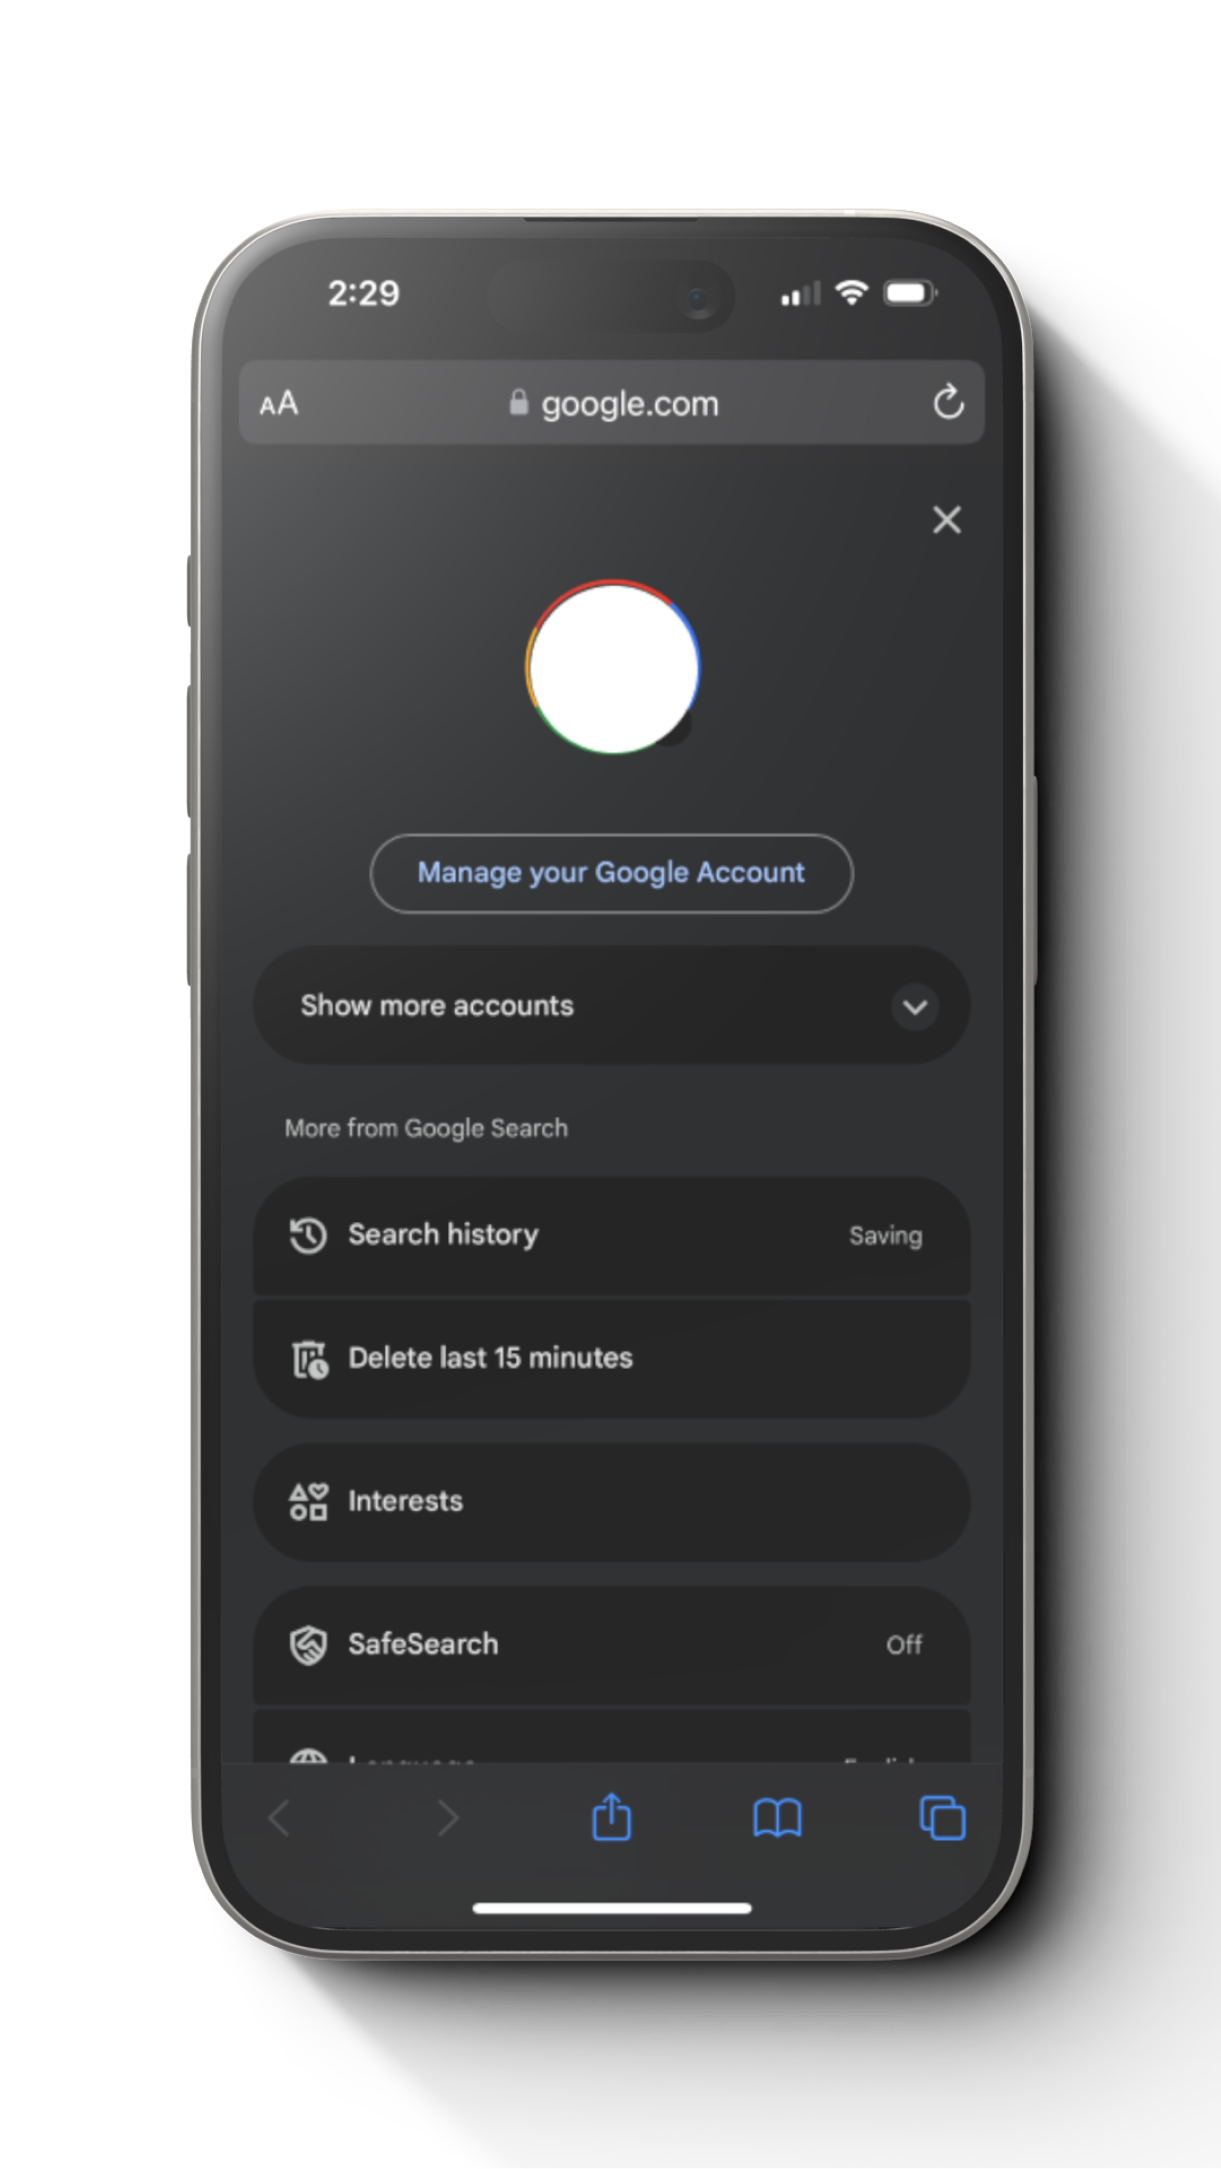
Log in to your Google account first in the browser and Select “Manage your Google Account”.
Step 2
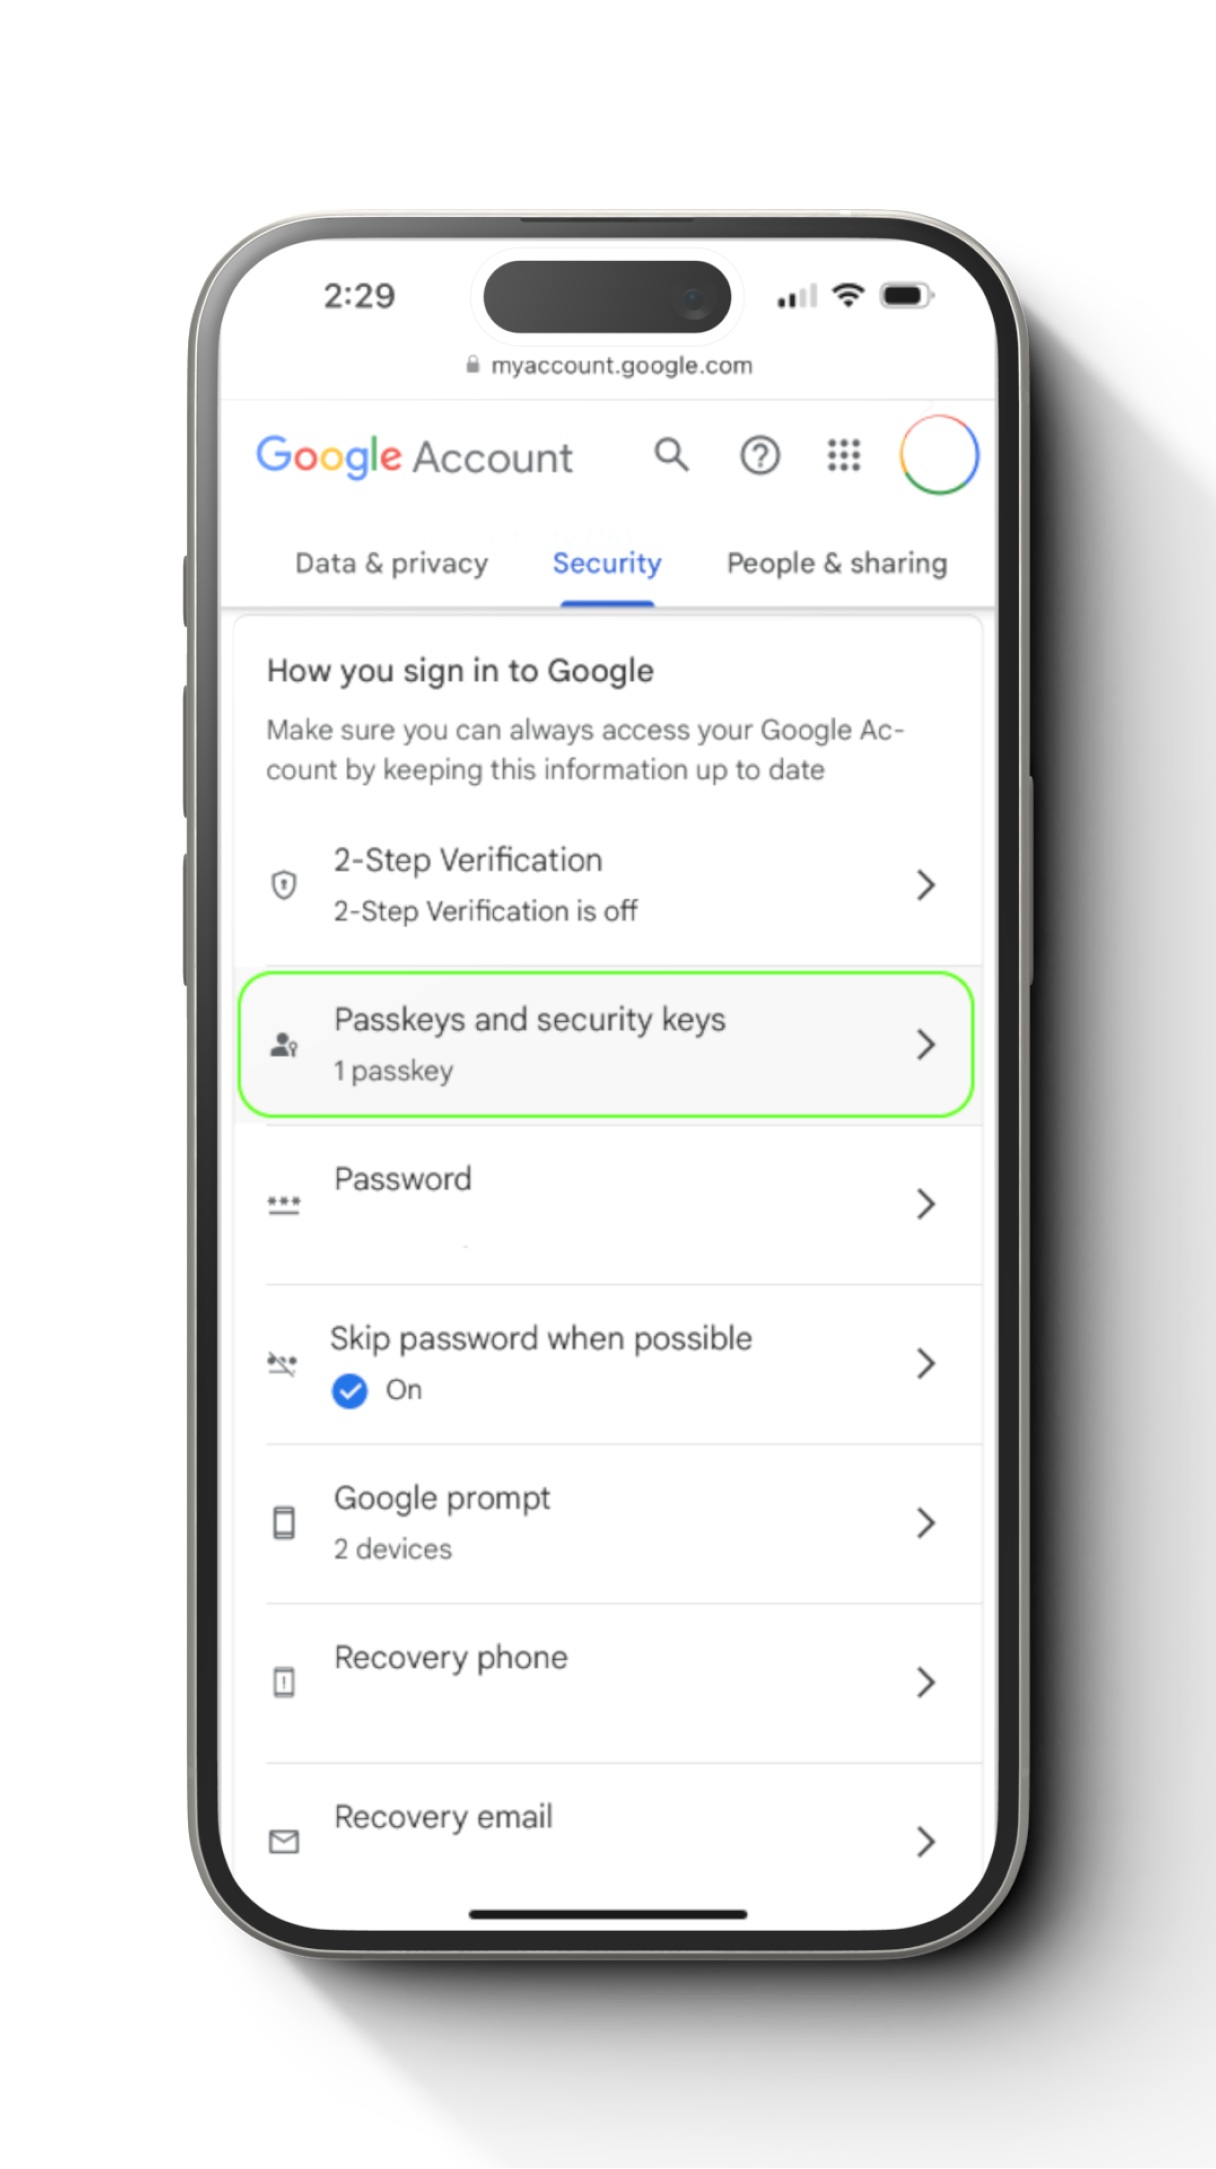
Go to “Security” and select “Passkeys and security keys”.
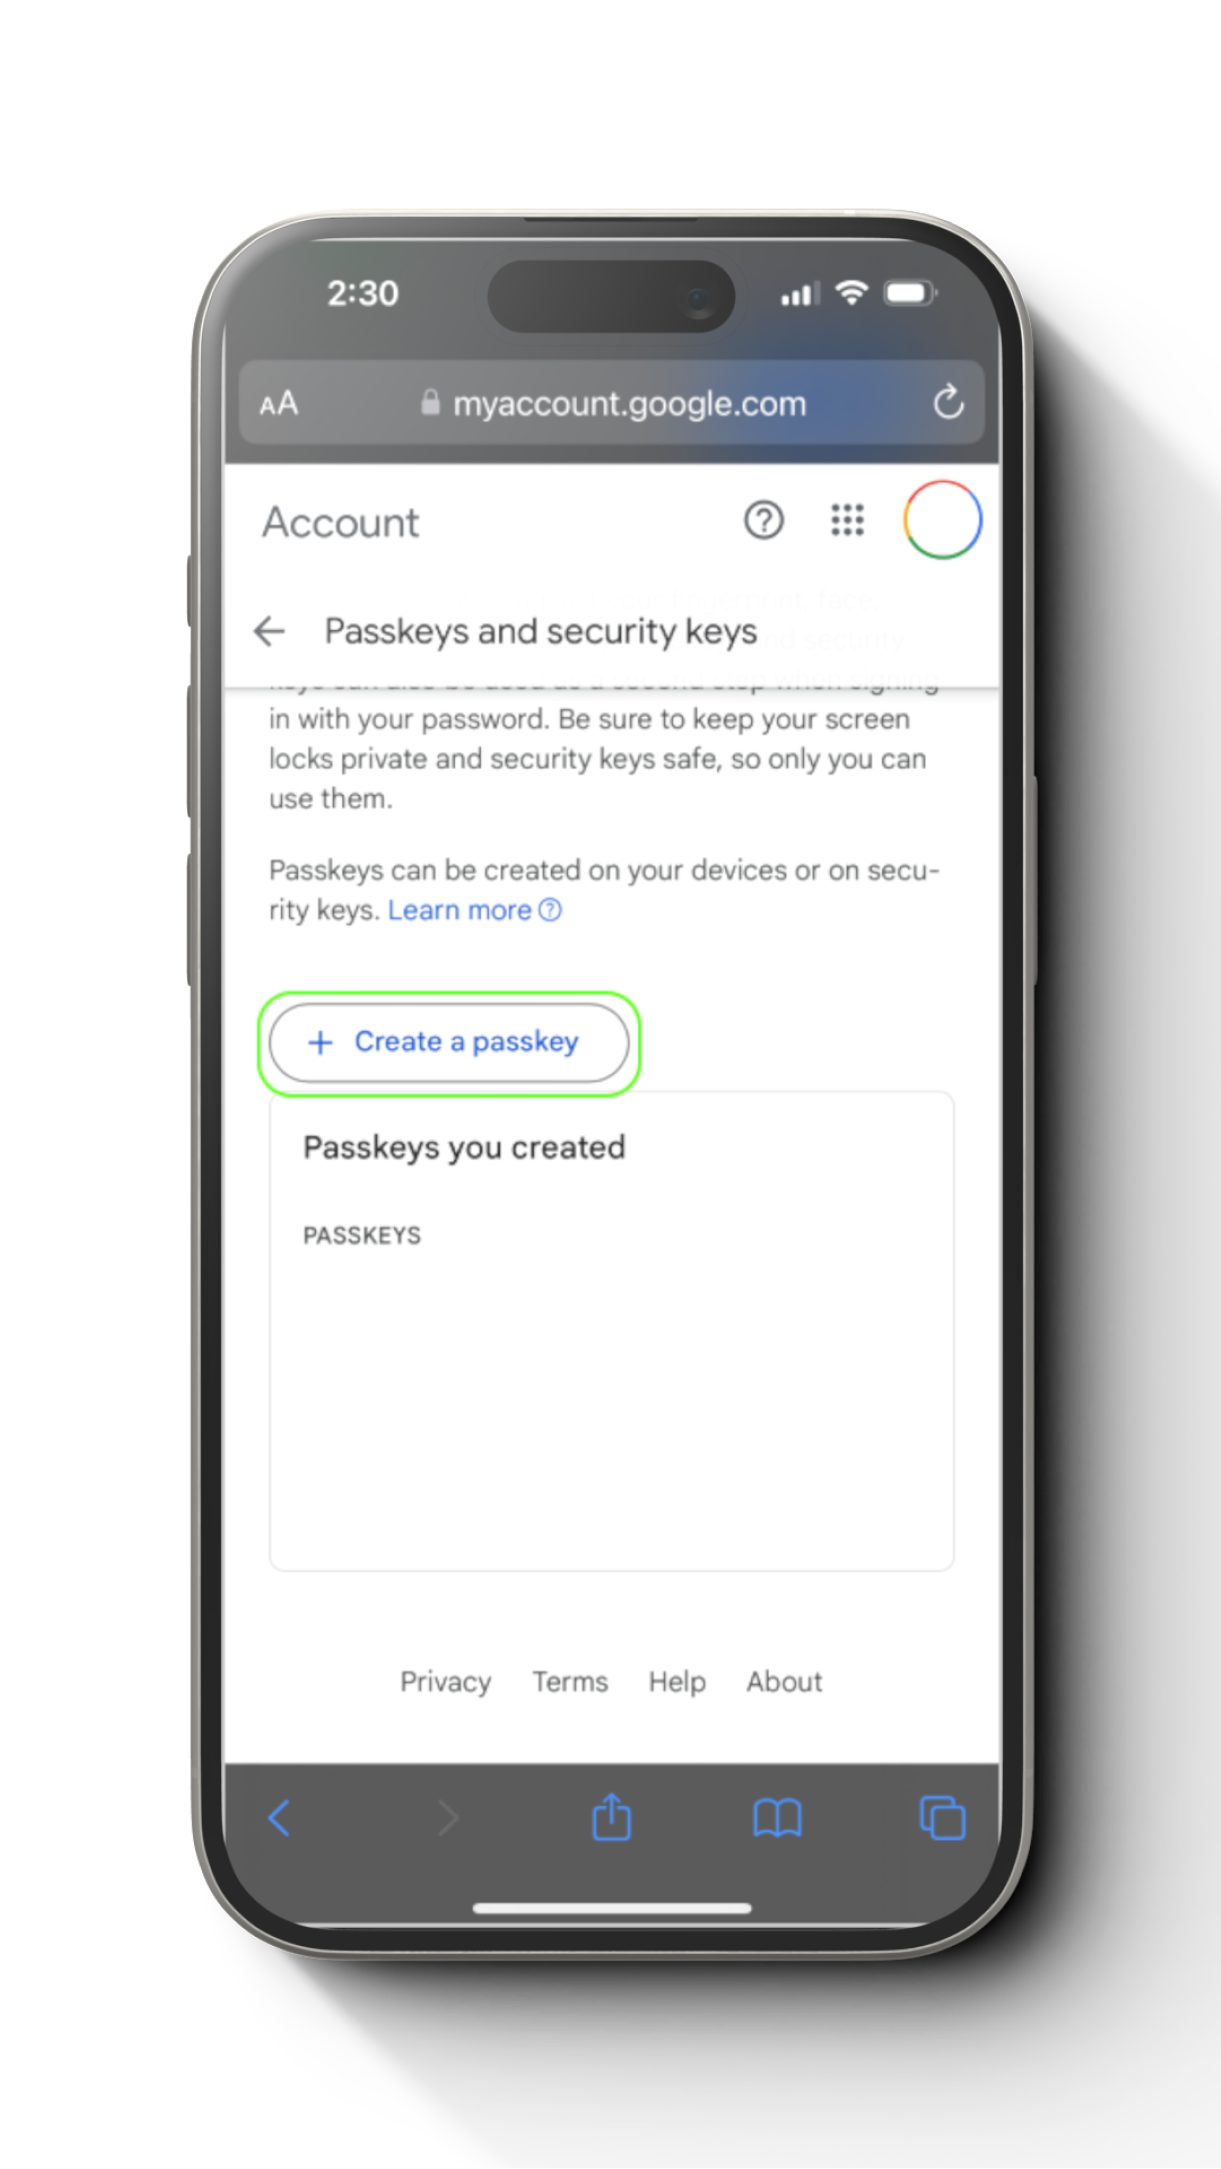
Step 3
Read the instruction carefully and select “Create a passkey”.
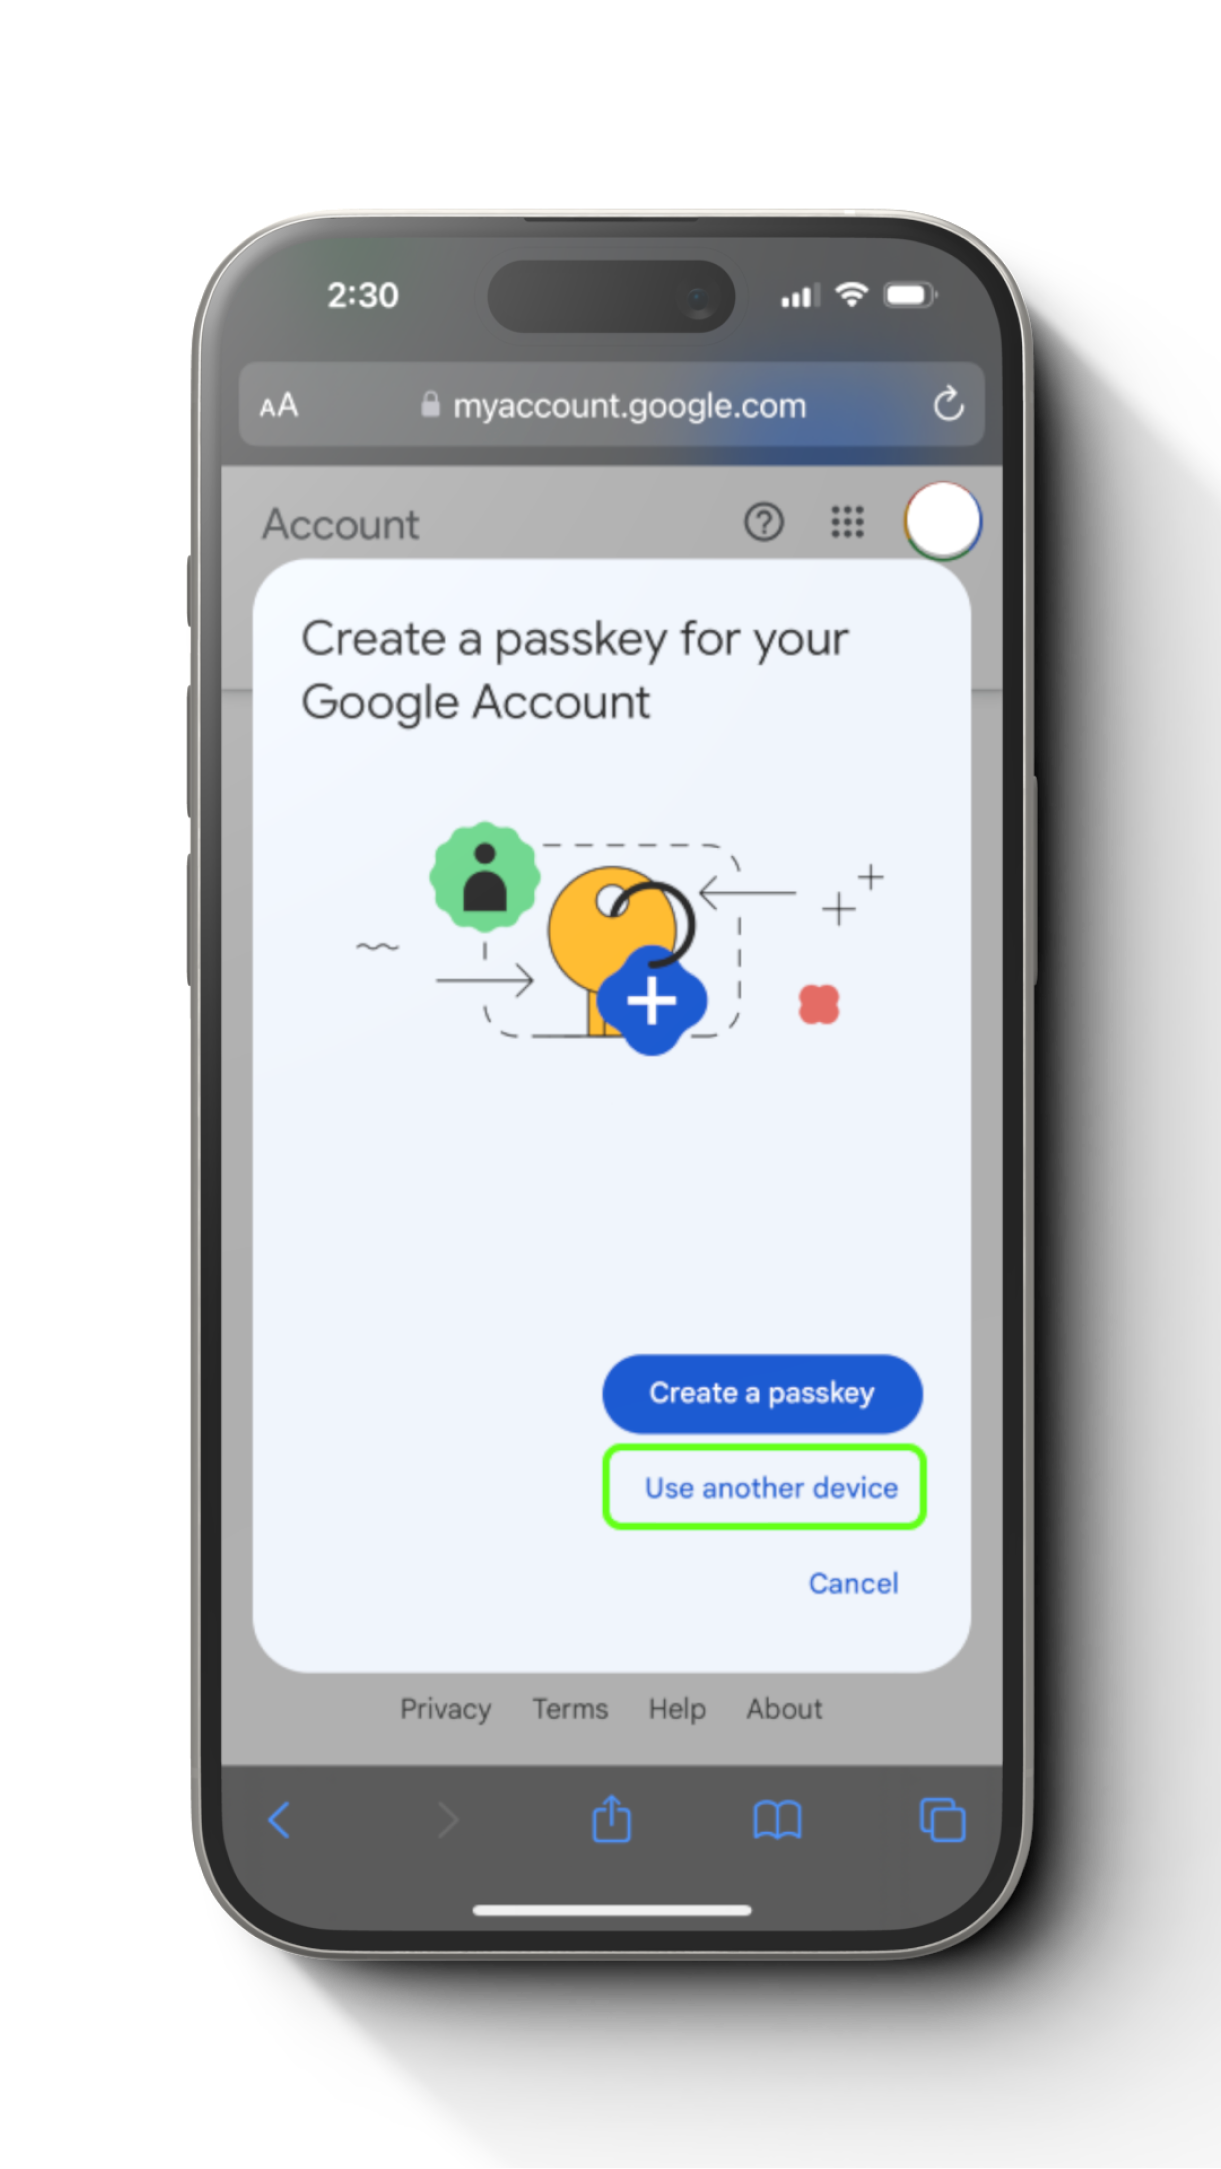
Step 4
A pop up will appear and within that ensure to select the “User another device”.
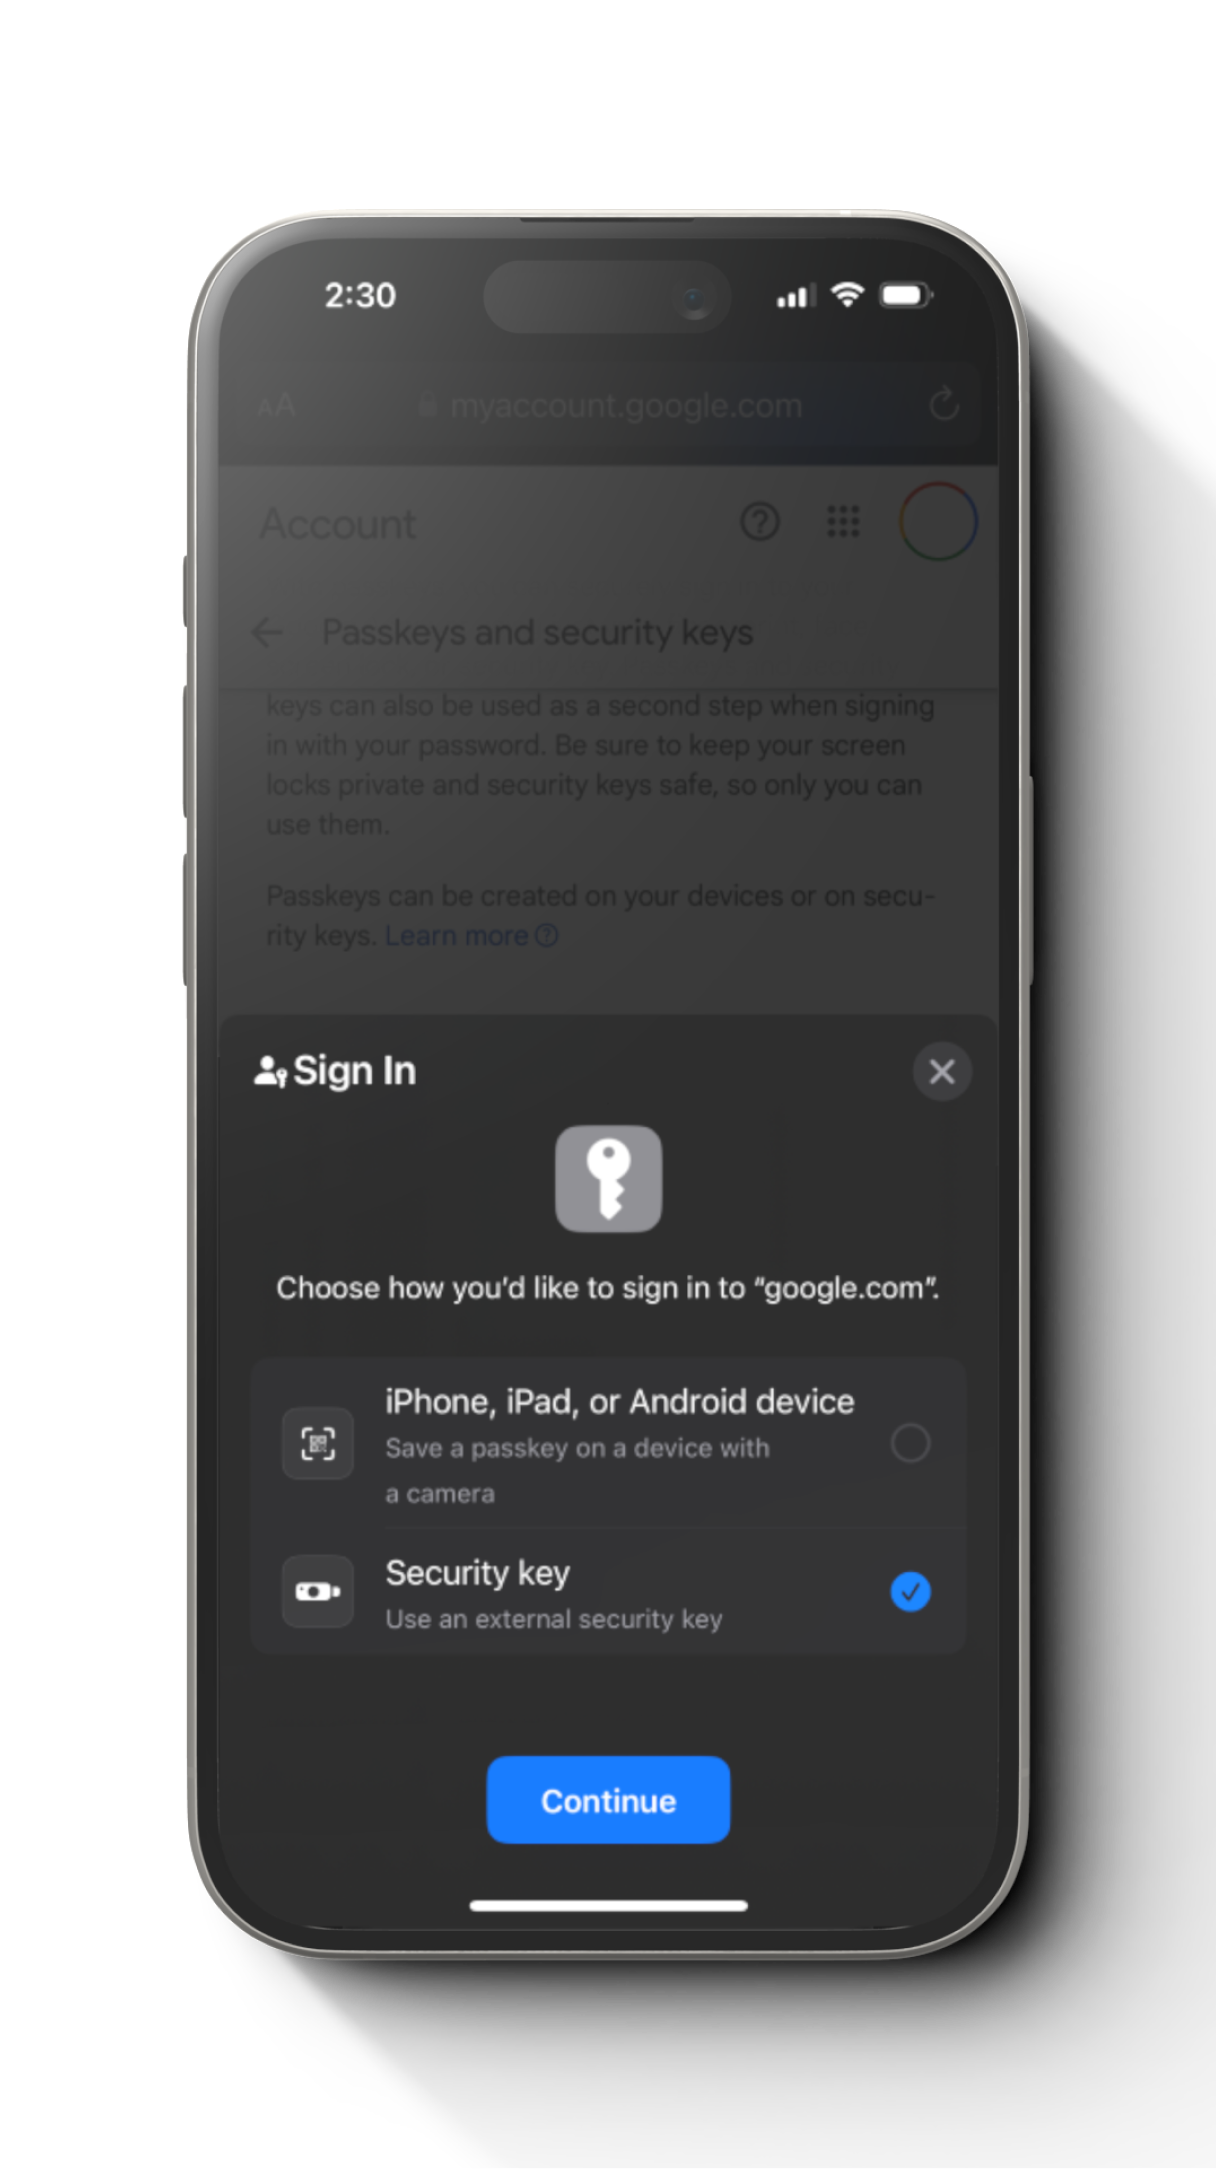
Step 5
A pop up will appear and within that ensure to select the “Security key”. Then select “Continue”.
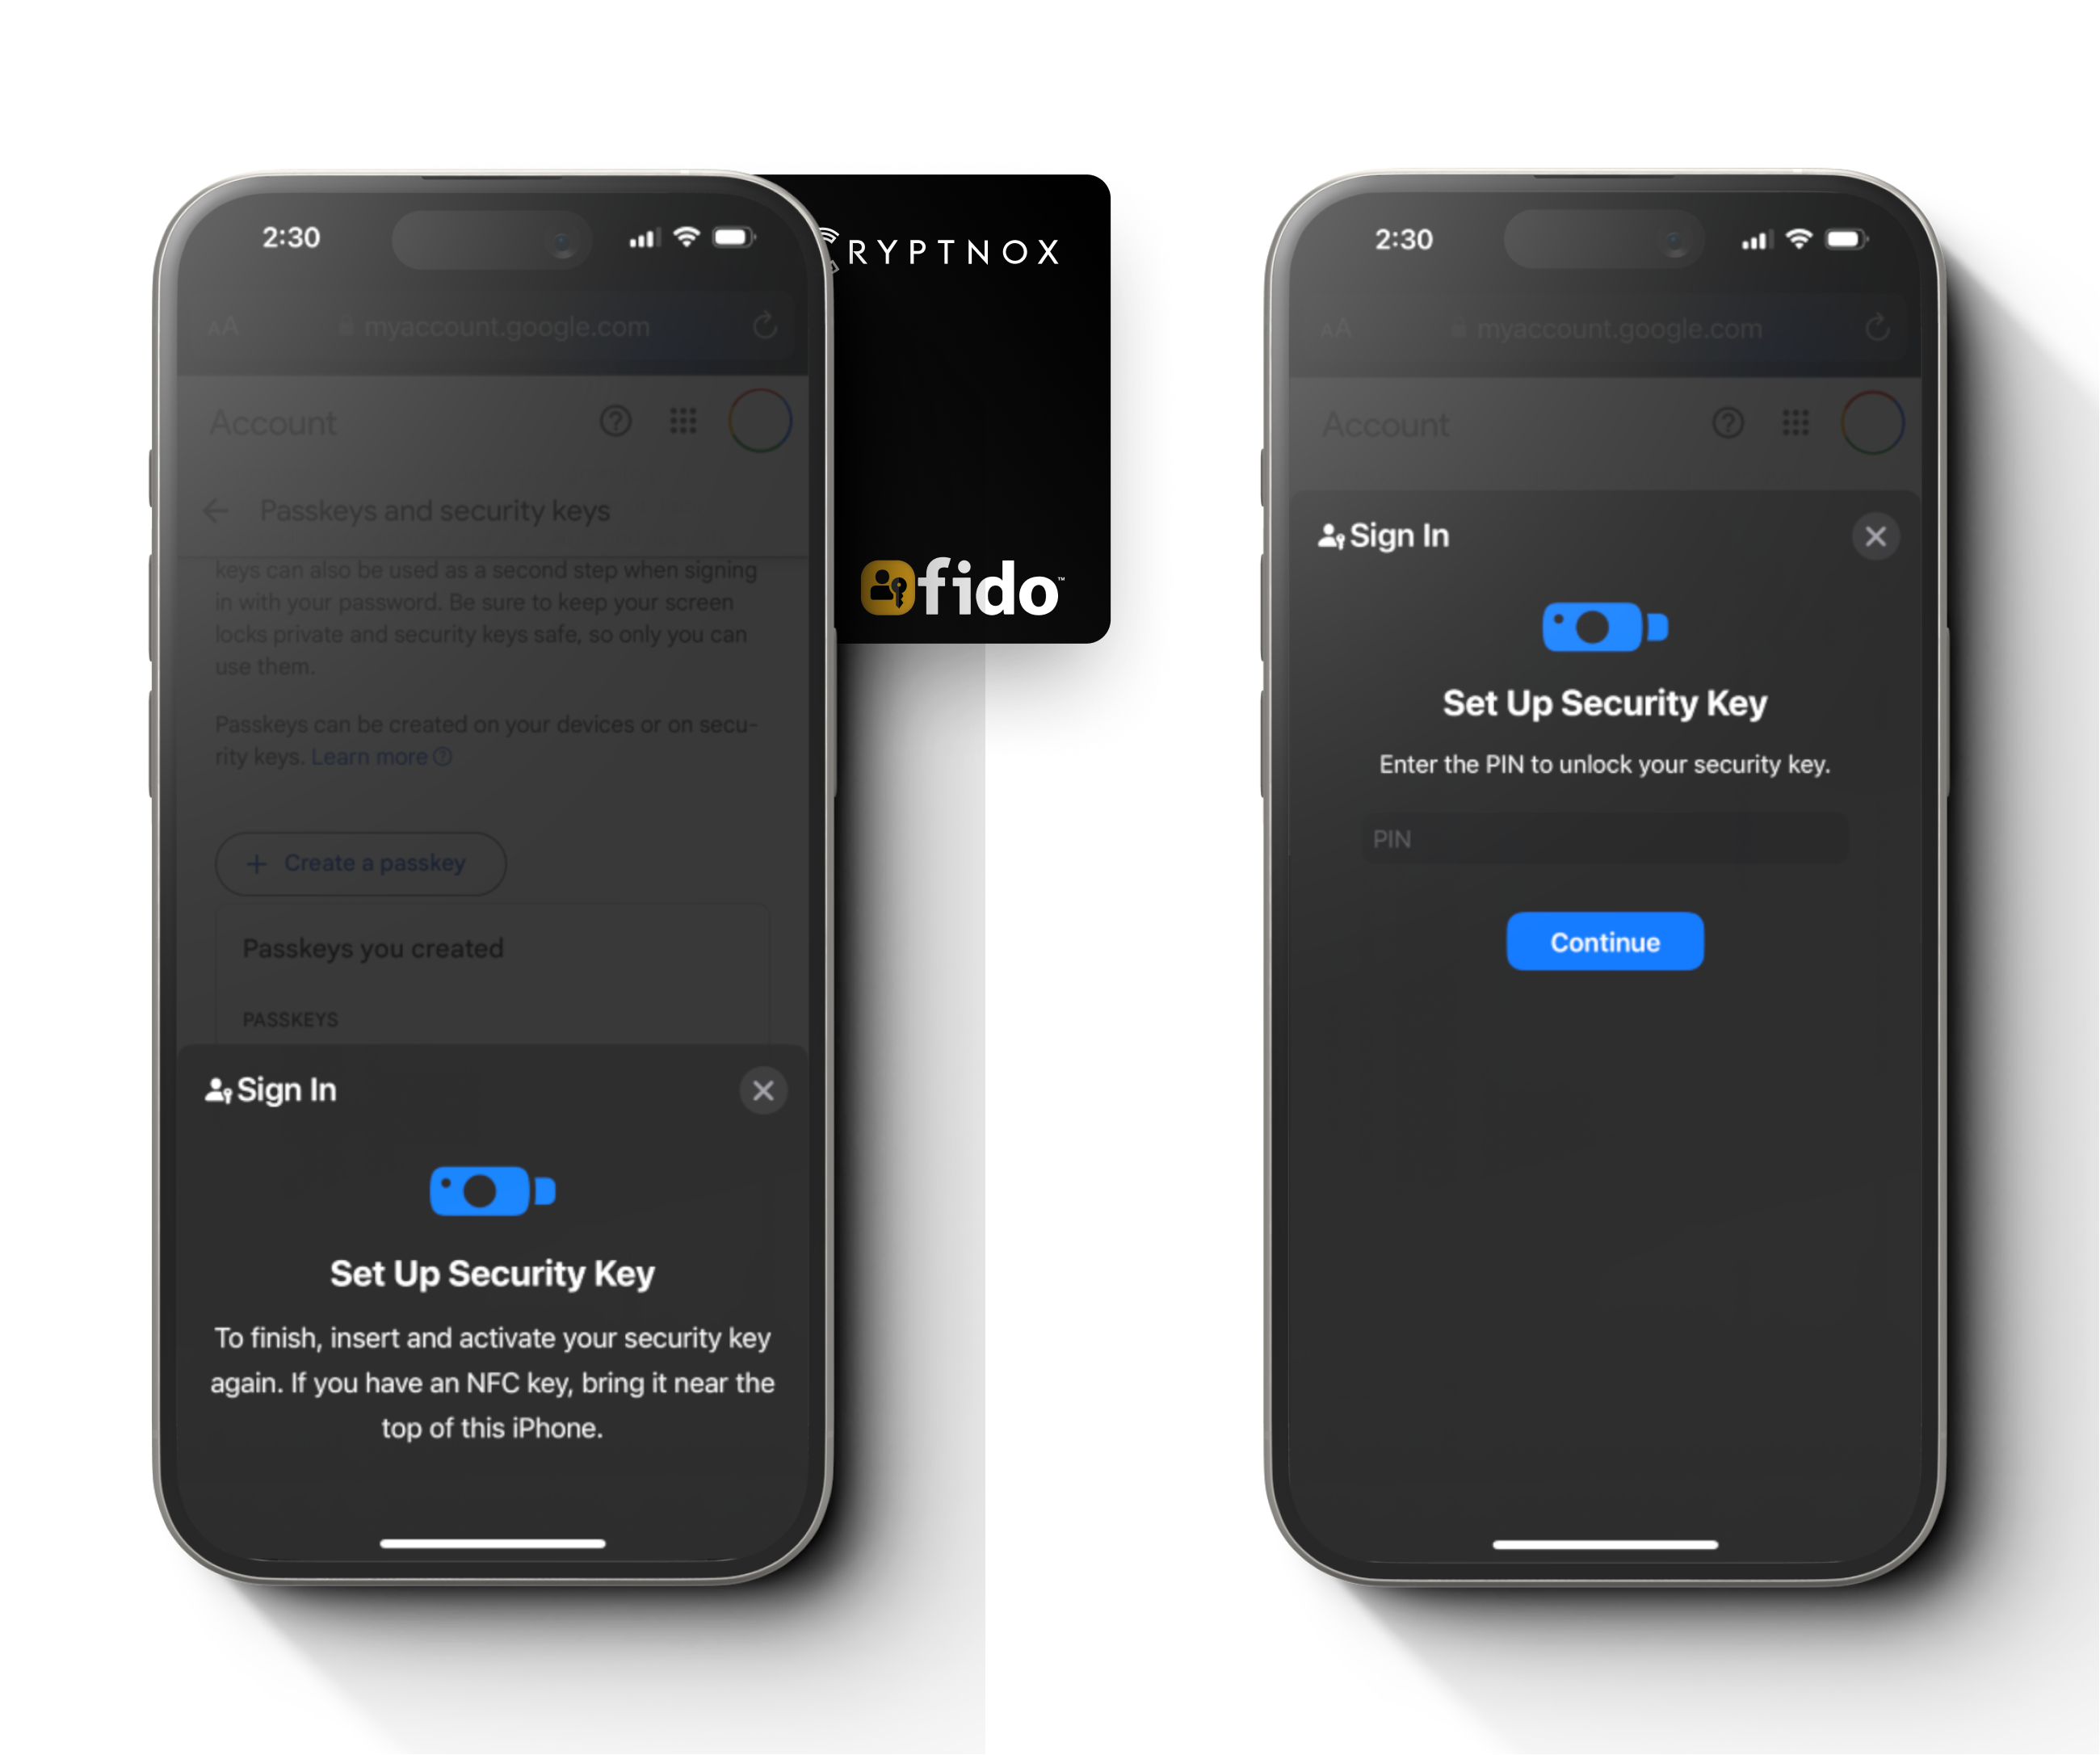
Step 6
The system will prompt the message to setup the security key. While the prompt is opening, tap the card at the back of the phone.
Once the card is registered properly, the system will ask you to put the PIN. Once you put in the PIN, select “Continue”
Important: Ensure you remember your PIN. It is advisable to save it securely or write it down in a safe place. You will need this PIN the next time you log in to a site where you have set up passkey authentication.
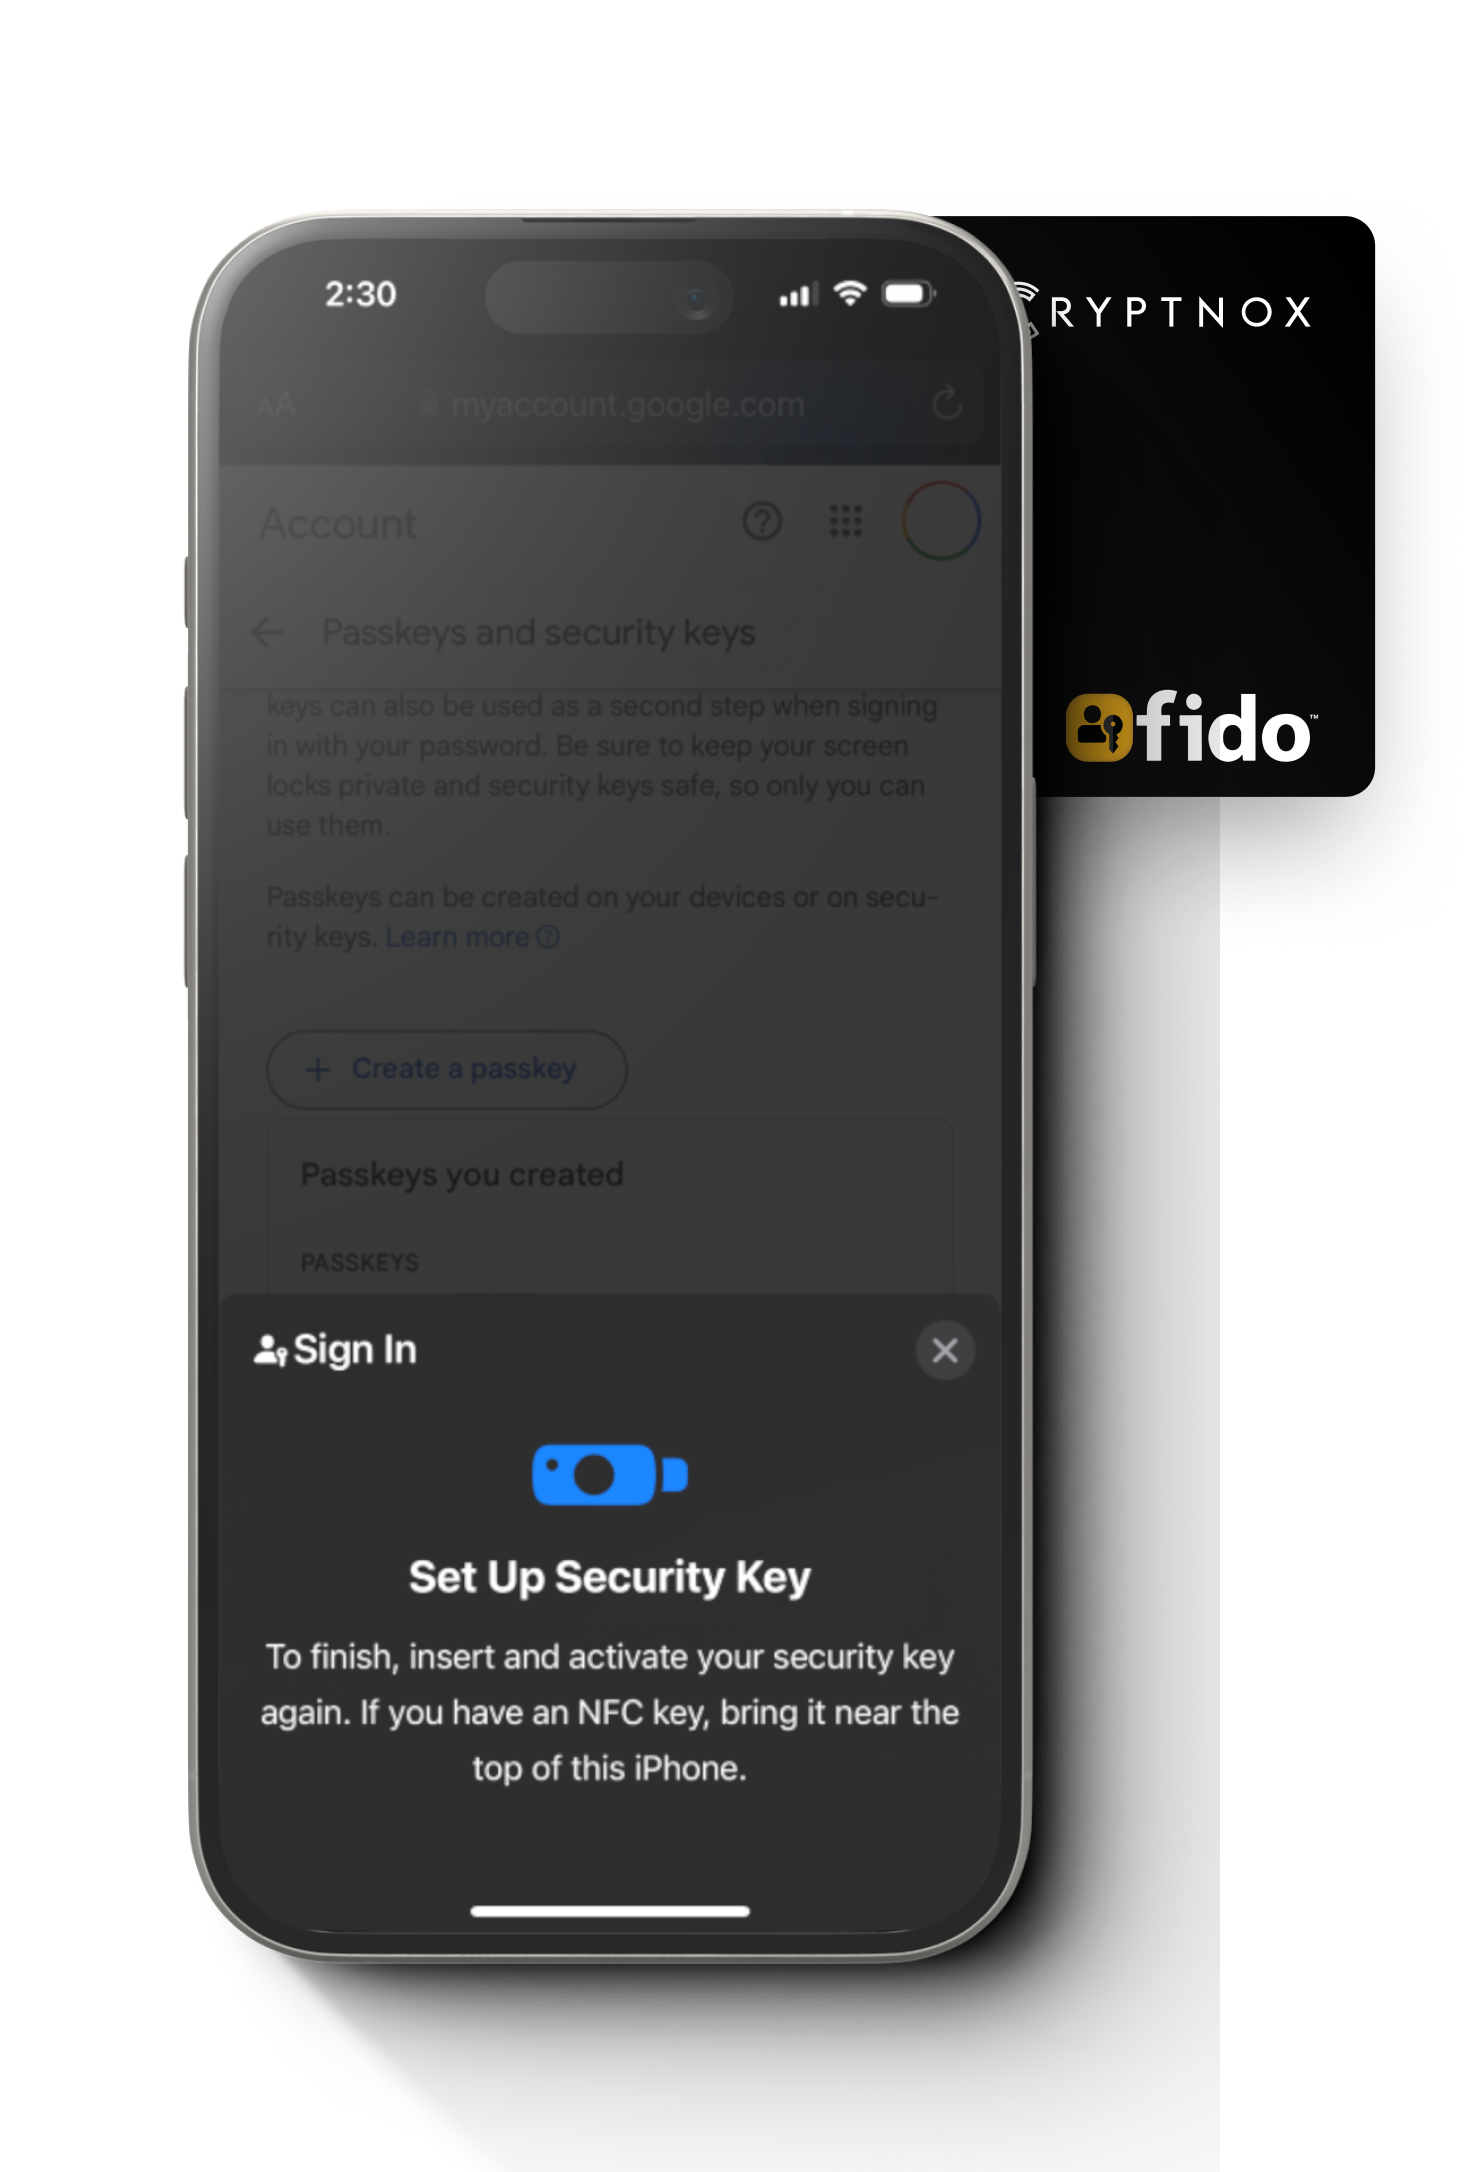
Step 7
The system will prompt the message tap the card again to activate it. Once it is done, it will automatically proceed to next step.
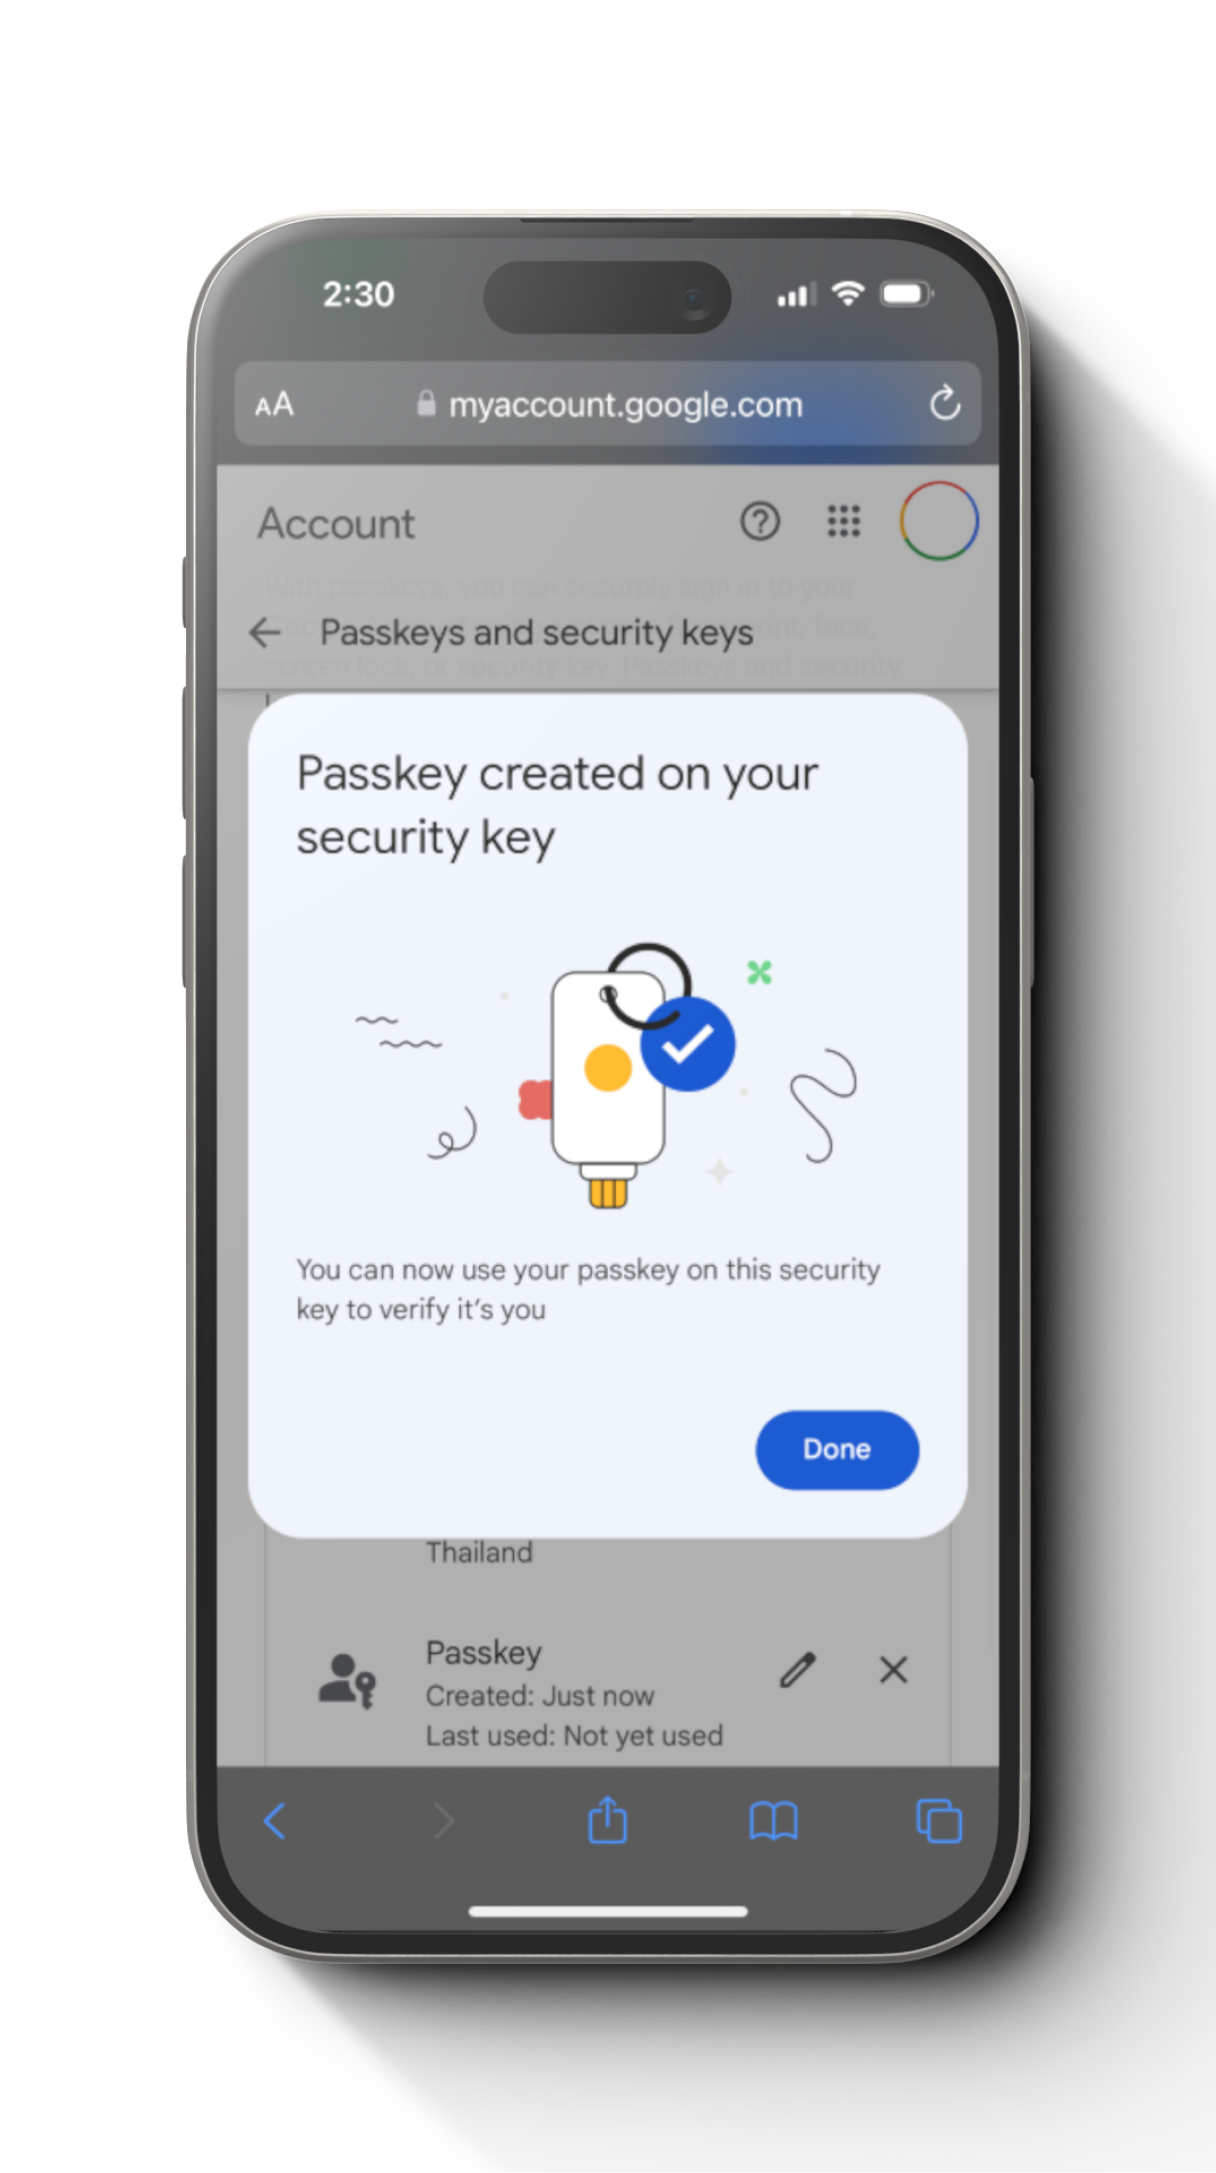
Step 8
Make sure you backup the code for the recovery purpose in case you forgot or lost the passkey and then select “Done”.
You have successfully setup the Cryptnox FIDO2 passkey on Google account.