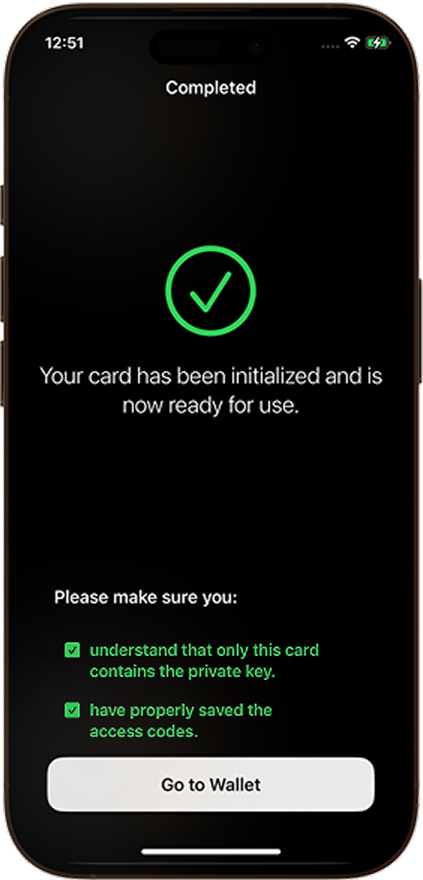
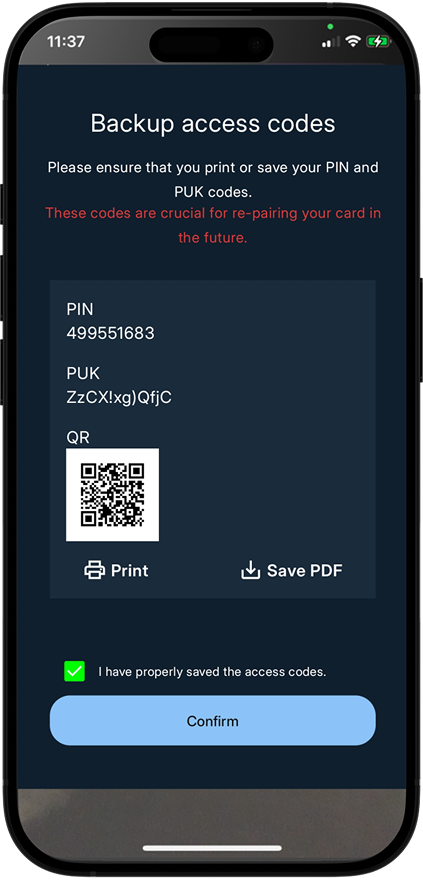
If the card is lost or damaged and you have not saved your PUK code and recovery information, there is no way to recover your digital assets. This is why saving your PUK, PIN, and QR code is critical
If a backup is required, look into the other initialization options
Step by step tutorial
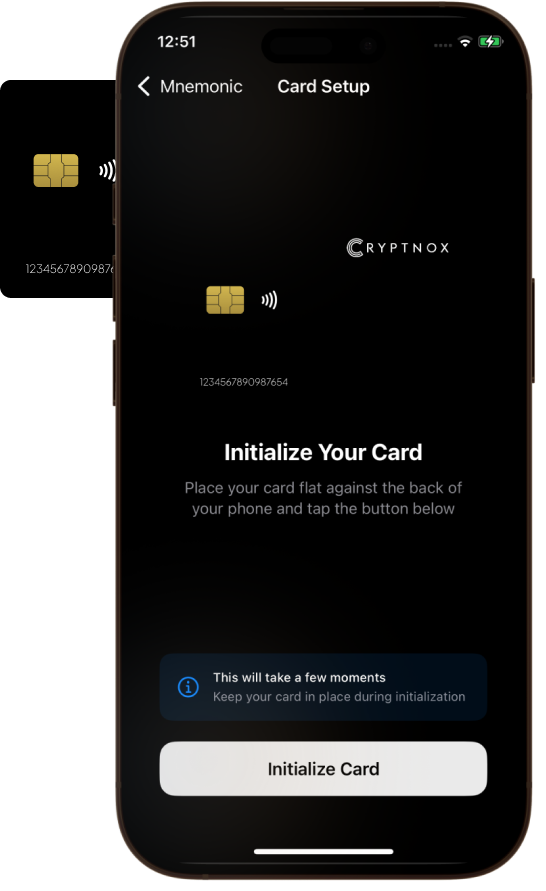
Description: With this process, a random seed is generated inside the card, and is never extractable
In this case, you have a very secure solution, but there are no backup option
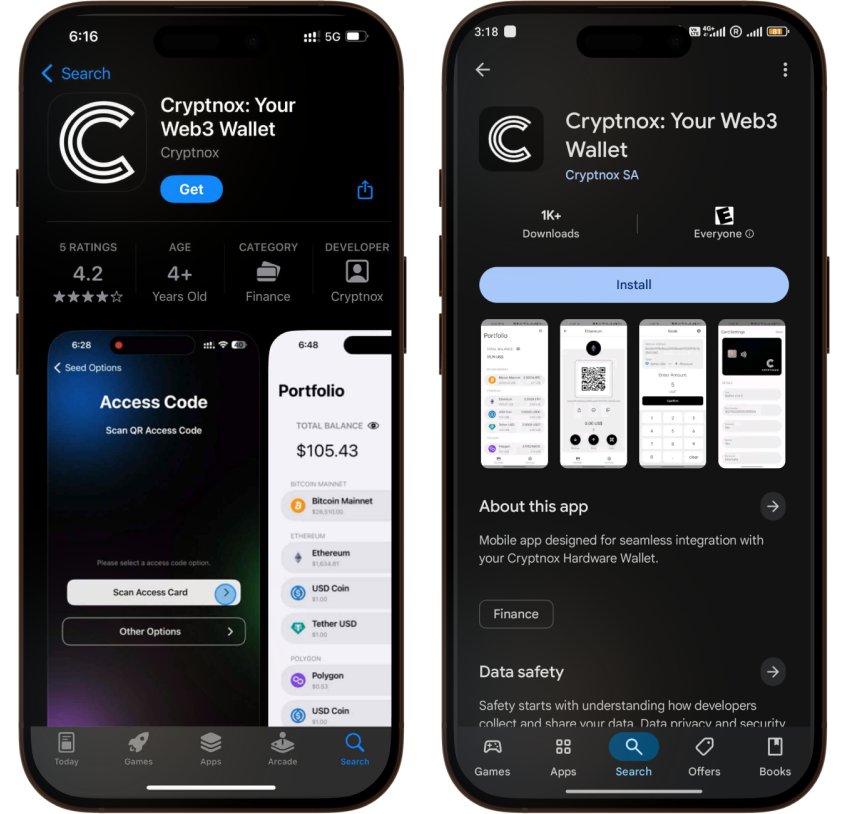
How to Download the Cryptnox application
Ensure that you have downloaded and installed the Cryptnox App on your device Launch the app to begin the initialization process
Note: card positioning on phones for near field communication (NFC) varies according to brands and models
Troubleshooting:
In case you need to restart the process from scratch, you simply need to make sure that both cards are reset
For this, go to:
Settings -> Card Administration (scan card when prompted) -> Reset Card (again, scan card when prompted)
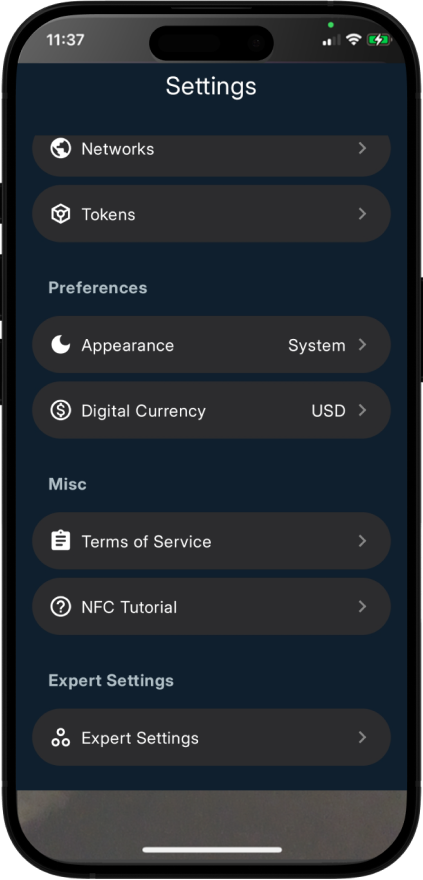
Setting Configuration
Step 1
Select setting icon at the top right corner.
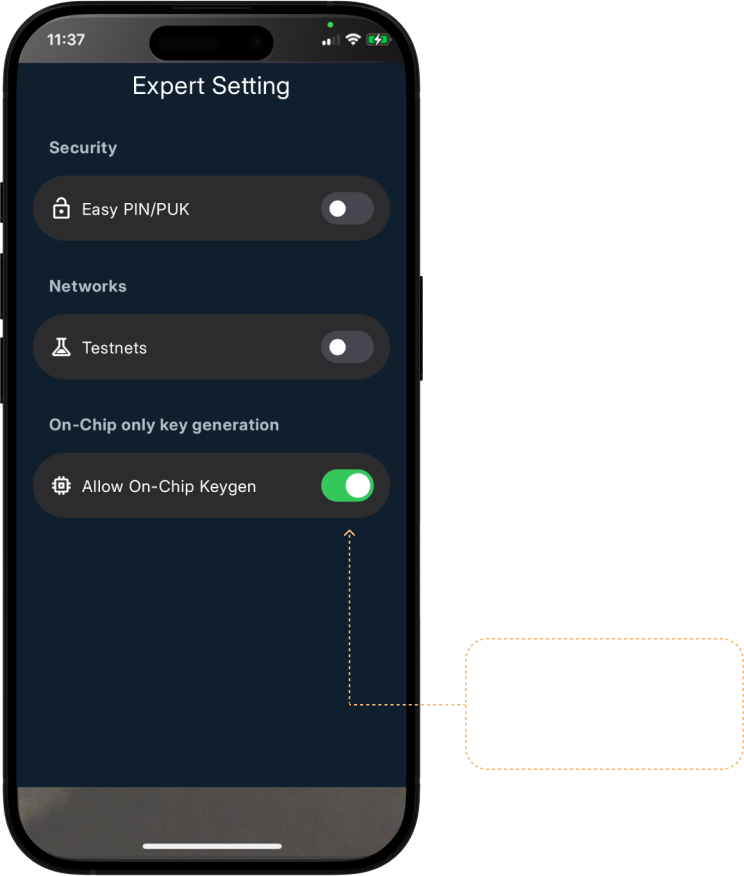
Step 2
Select “Expert Settings”
Step 3
Here you have to turn on “Allow On-Chip Keygen” option
Step by step tutorial
Step 1
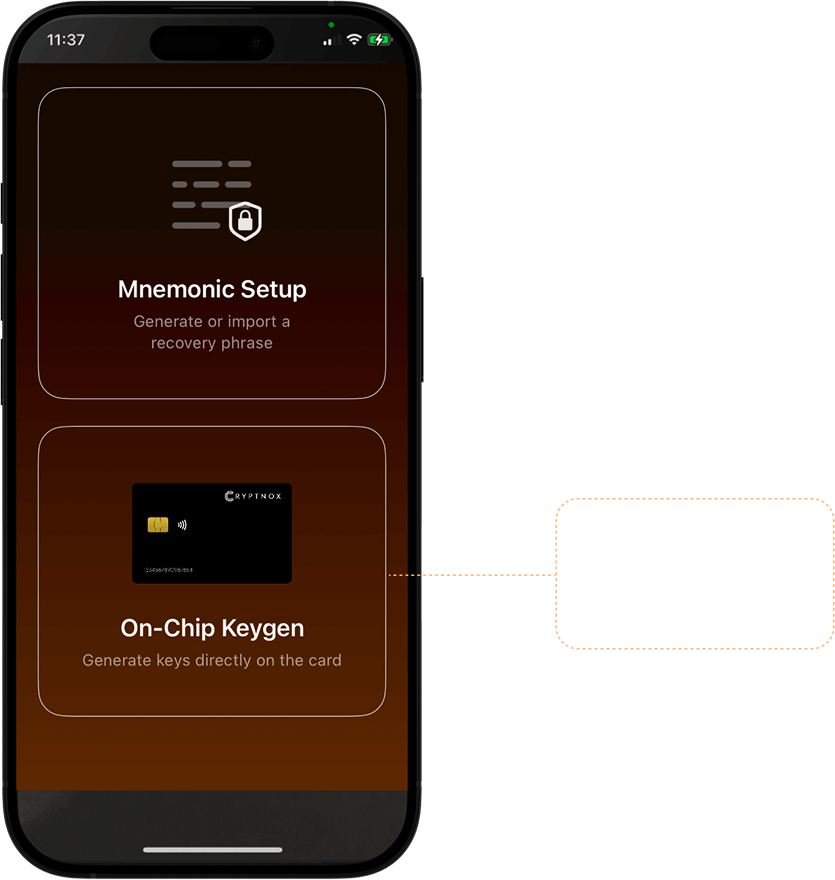
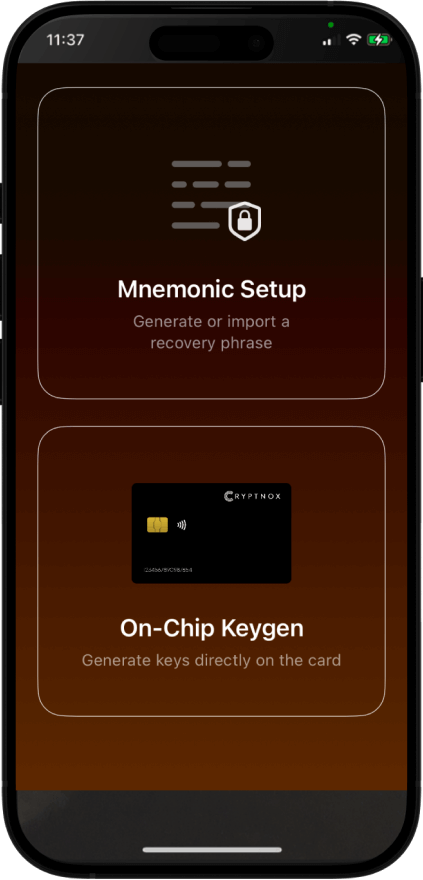
Select “Initialize”
Step 2
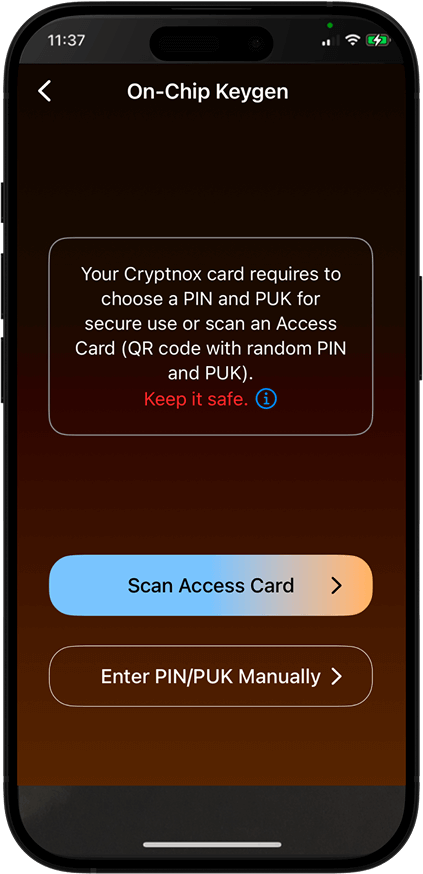
Select “On-Chip Keygen”
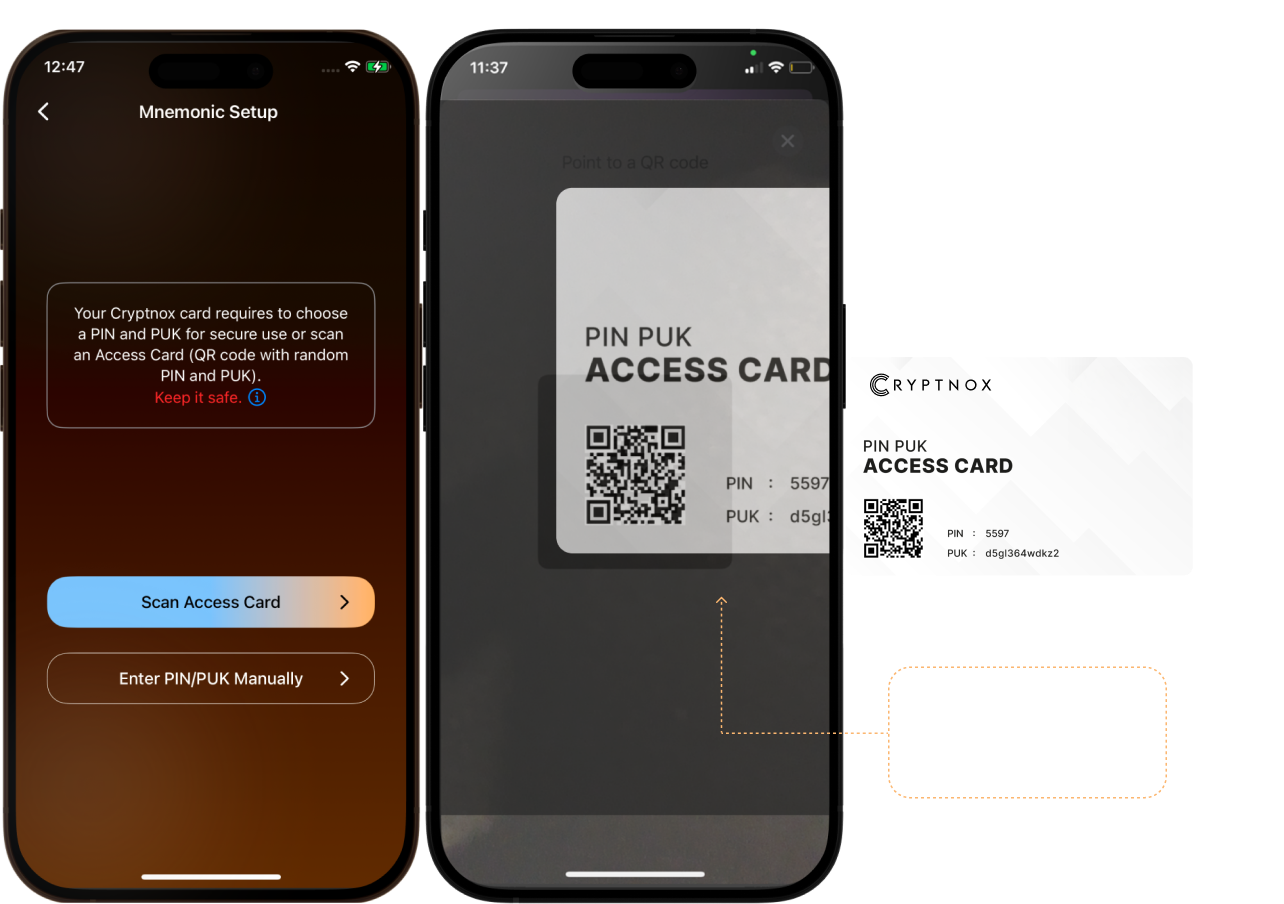
Step 3
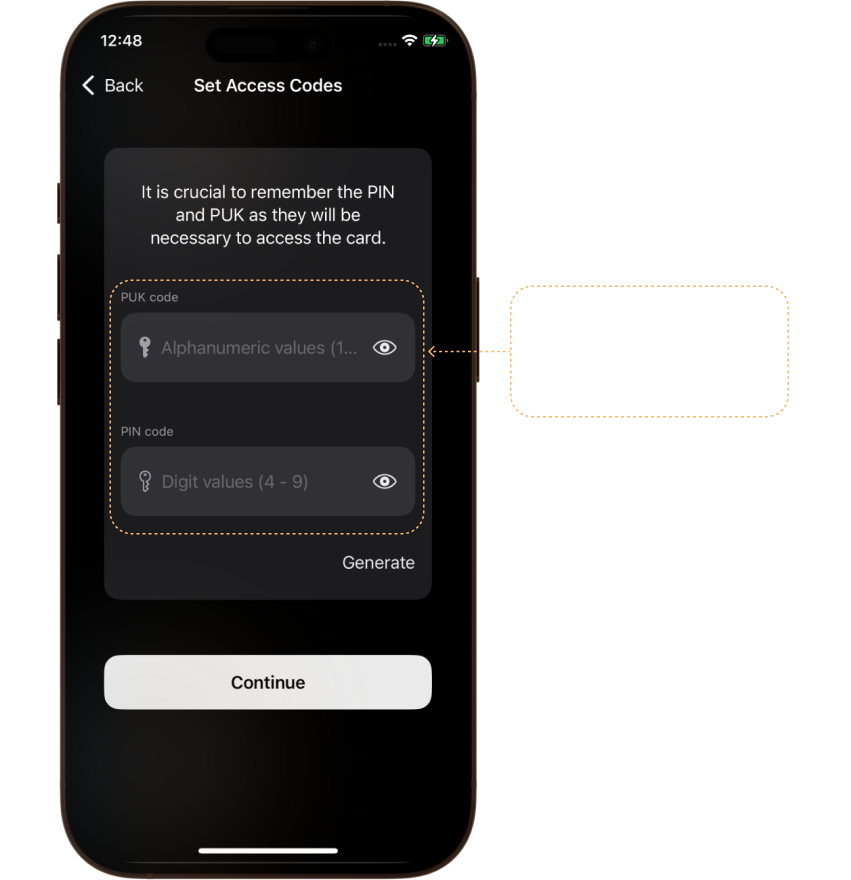
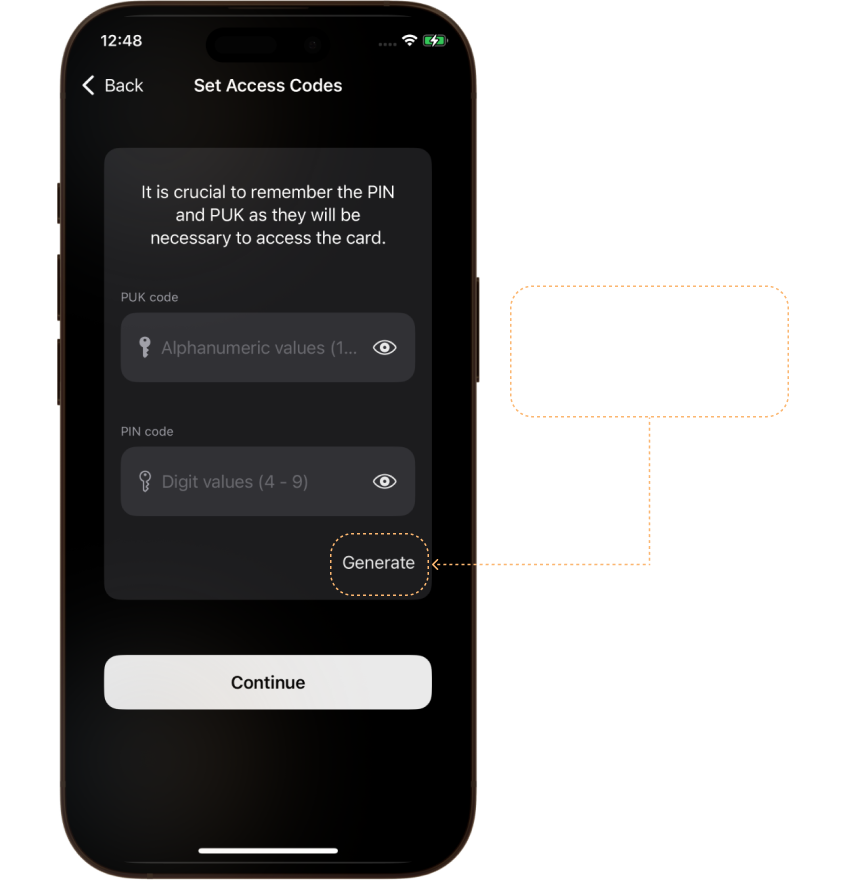
Here you have two options, “scan access card” or “enter PIN/PUK manually” This setup will proceed with “scan access card” option Select “Access Card” and Scan the QR code on the card